


Introduction
Breast cancer remains one of the world’s most common cancers, accounting for up to one quarter of cancers diagnosed in women.1 However, its treatment has changed significantly since the age of radical mastectomies. An expansion of understanding regarding the genetic role in this disease has entered the public’s consciousness and mainstream media. This has led to a shift, where prophylactic surgeries have become widespread. It has also caused a change in practice, with many patients opting for contralateral prophylactic mastectomy at the time of their cancer surgery.2 All these shifts have been accompanied by continued advances in reconstructive options.
Patients have reported high levels of satisfaction following nipple-areola complex (NAC) reconstruction, with the majority happy to recommend it to others.3 It is often seen as the final step in what will have been an arduous journey for the patient. The importance of this type of reconstruction in a patient’s emotional wellbeing cannot be overstated.
In this guide, we discuss a technique that allows nipple tattooing to be done at the time of the patient’s nipple reconstruction surgery, using simple equipment available in most hospitals, without the need for a specialist tattoo machine. This simple technique reconstructs the full NAC aesthetic unit, giving a more immediate result compared to the traditional two-stage process. By allowing this step to be completed at the time of their reconstruction, one could propose their satisfaction is accelerated, and allows their treatment journey to come to an end sooner.
Surgical technique
We propose this method as both a simple and cost-effective technique, which should be feasible in most centres, as it does not require a specialist tattoo machine. It uses a modified C-V flap and a surgical drill system with a small size 5 rose burr.
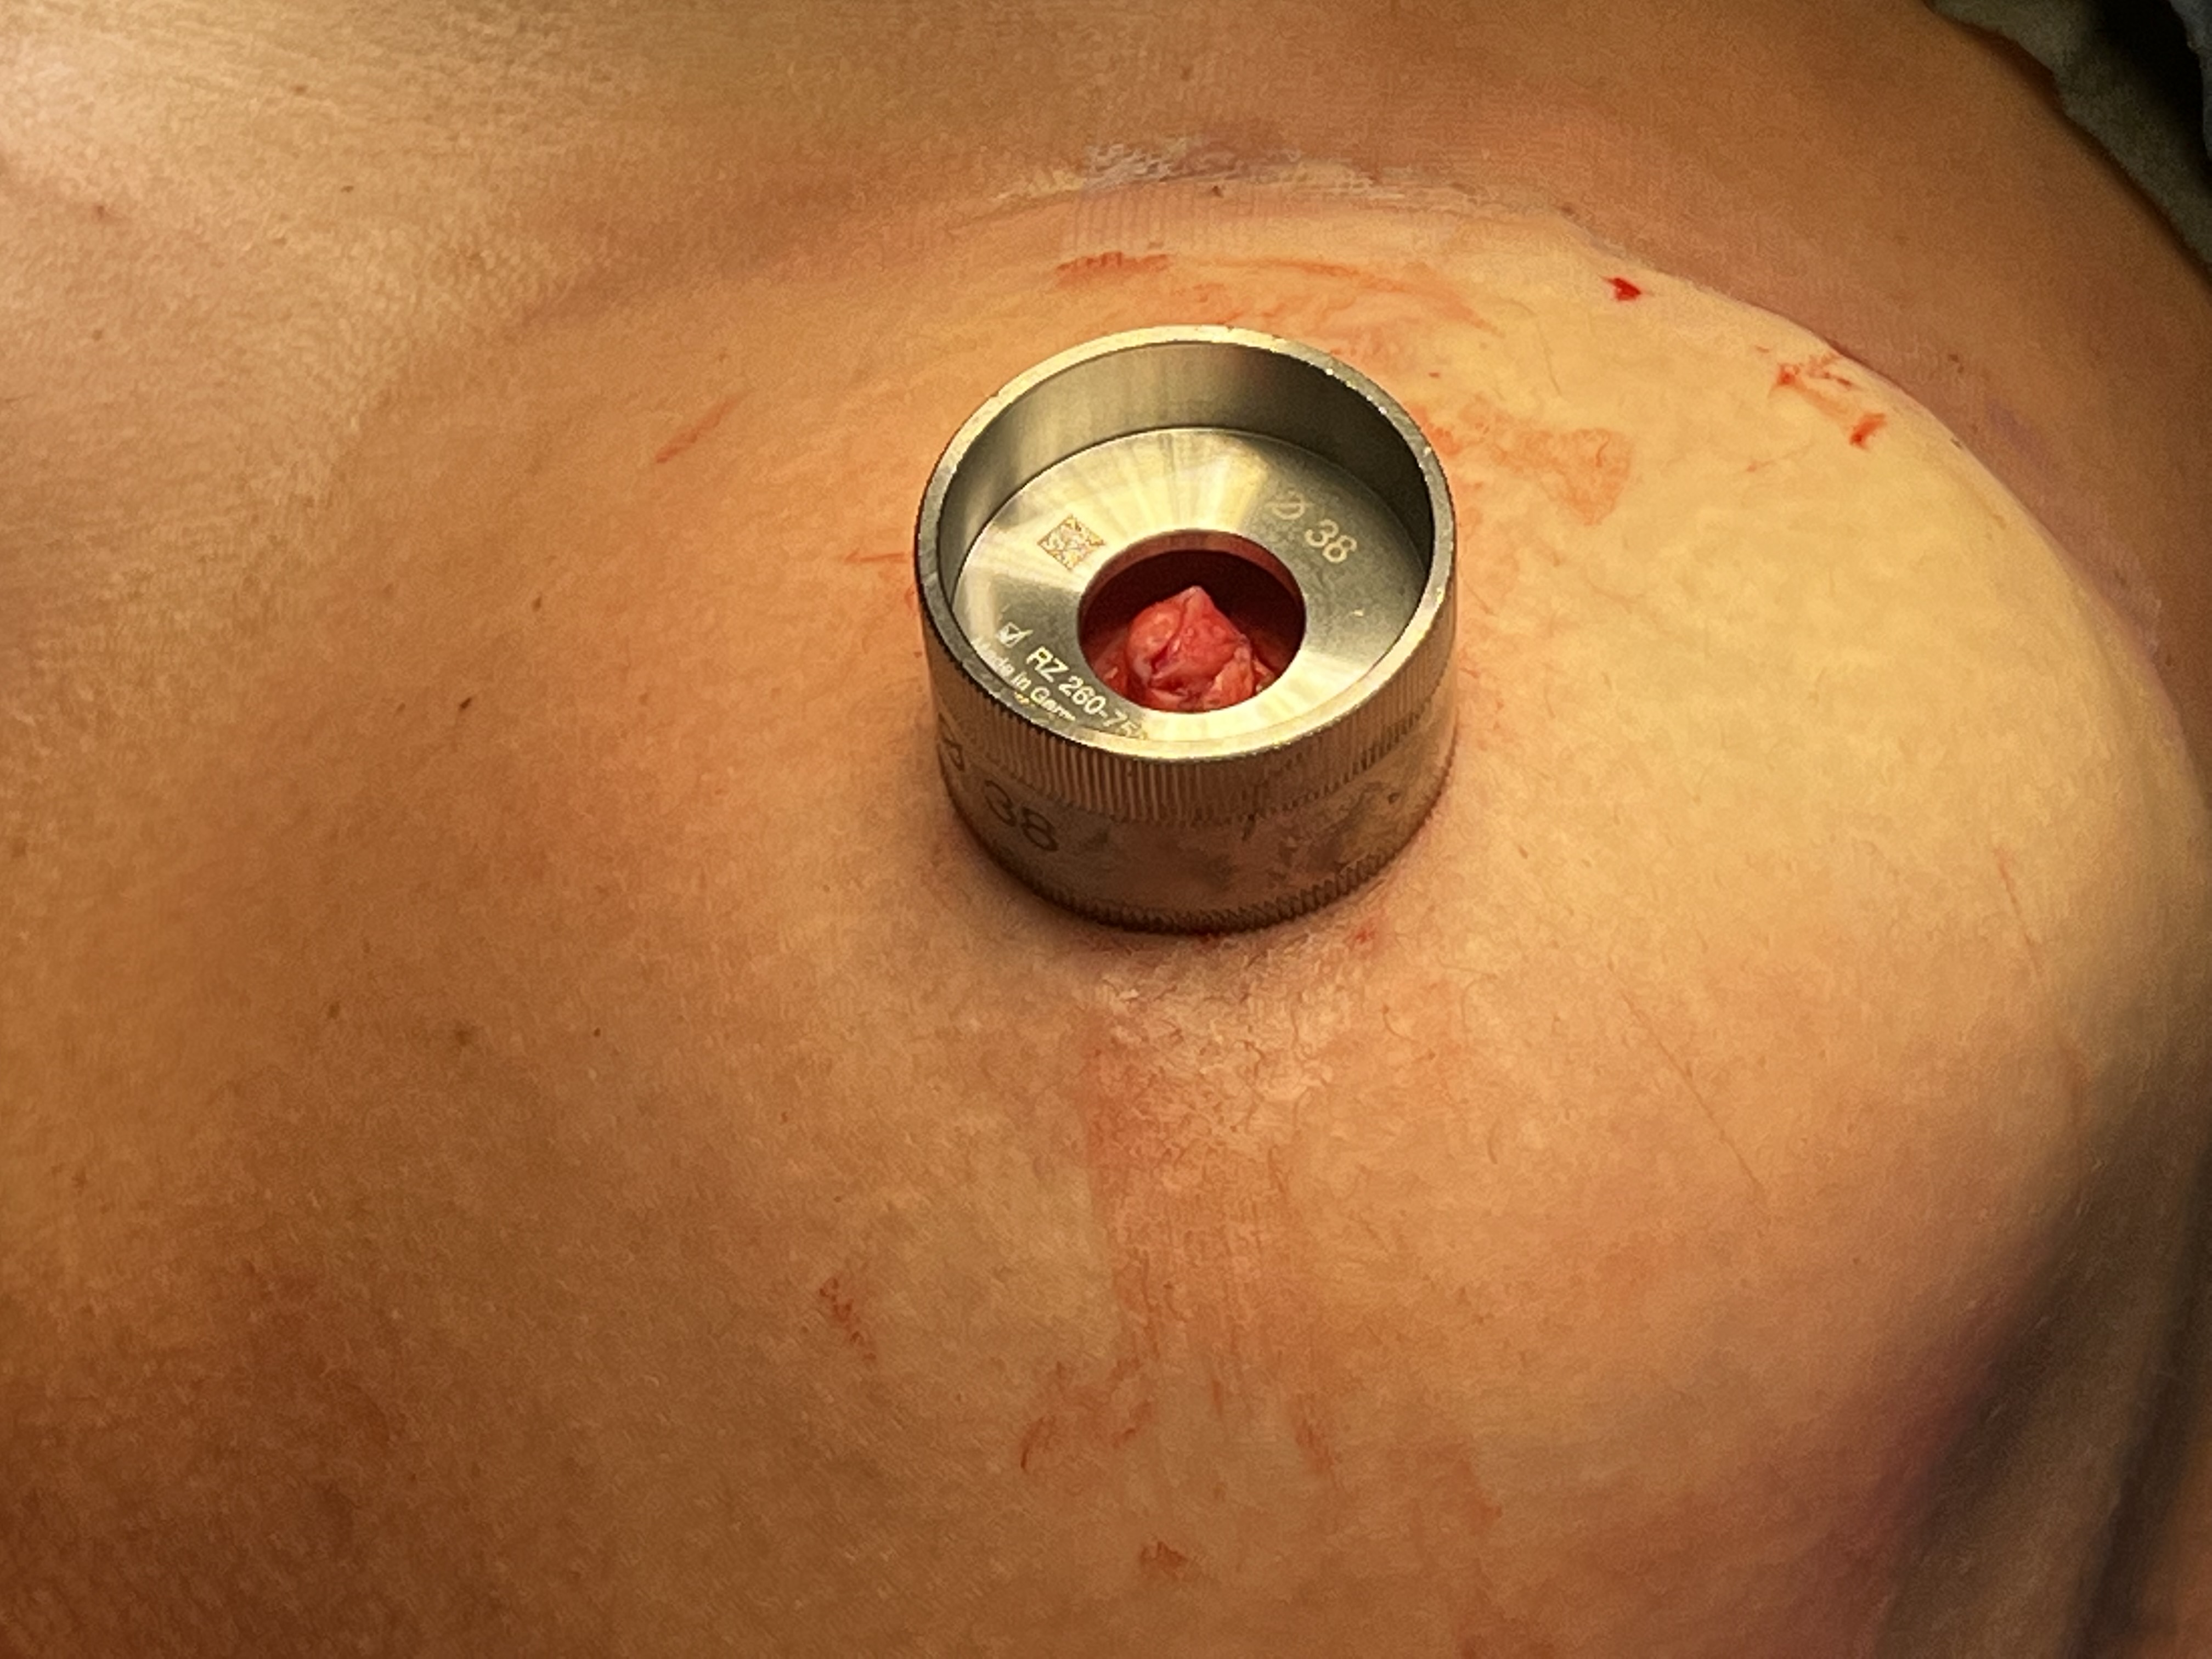
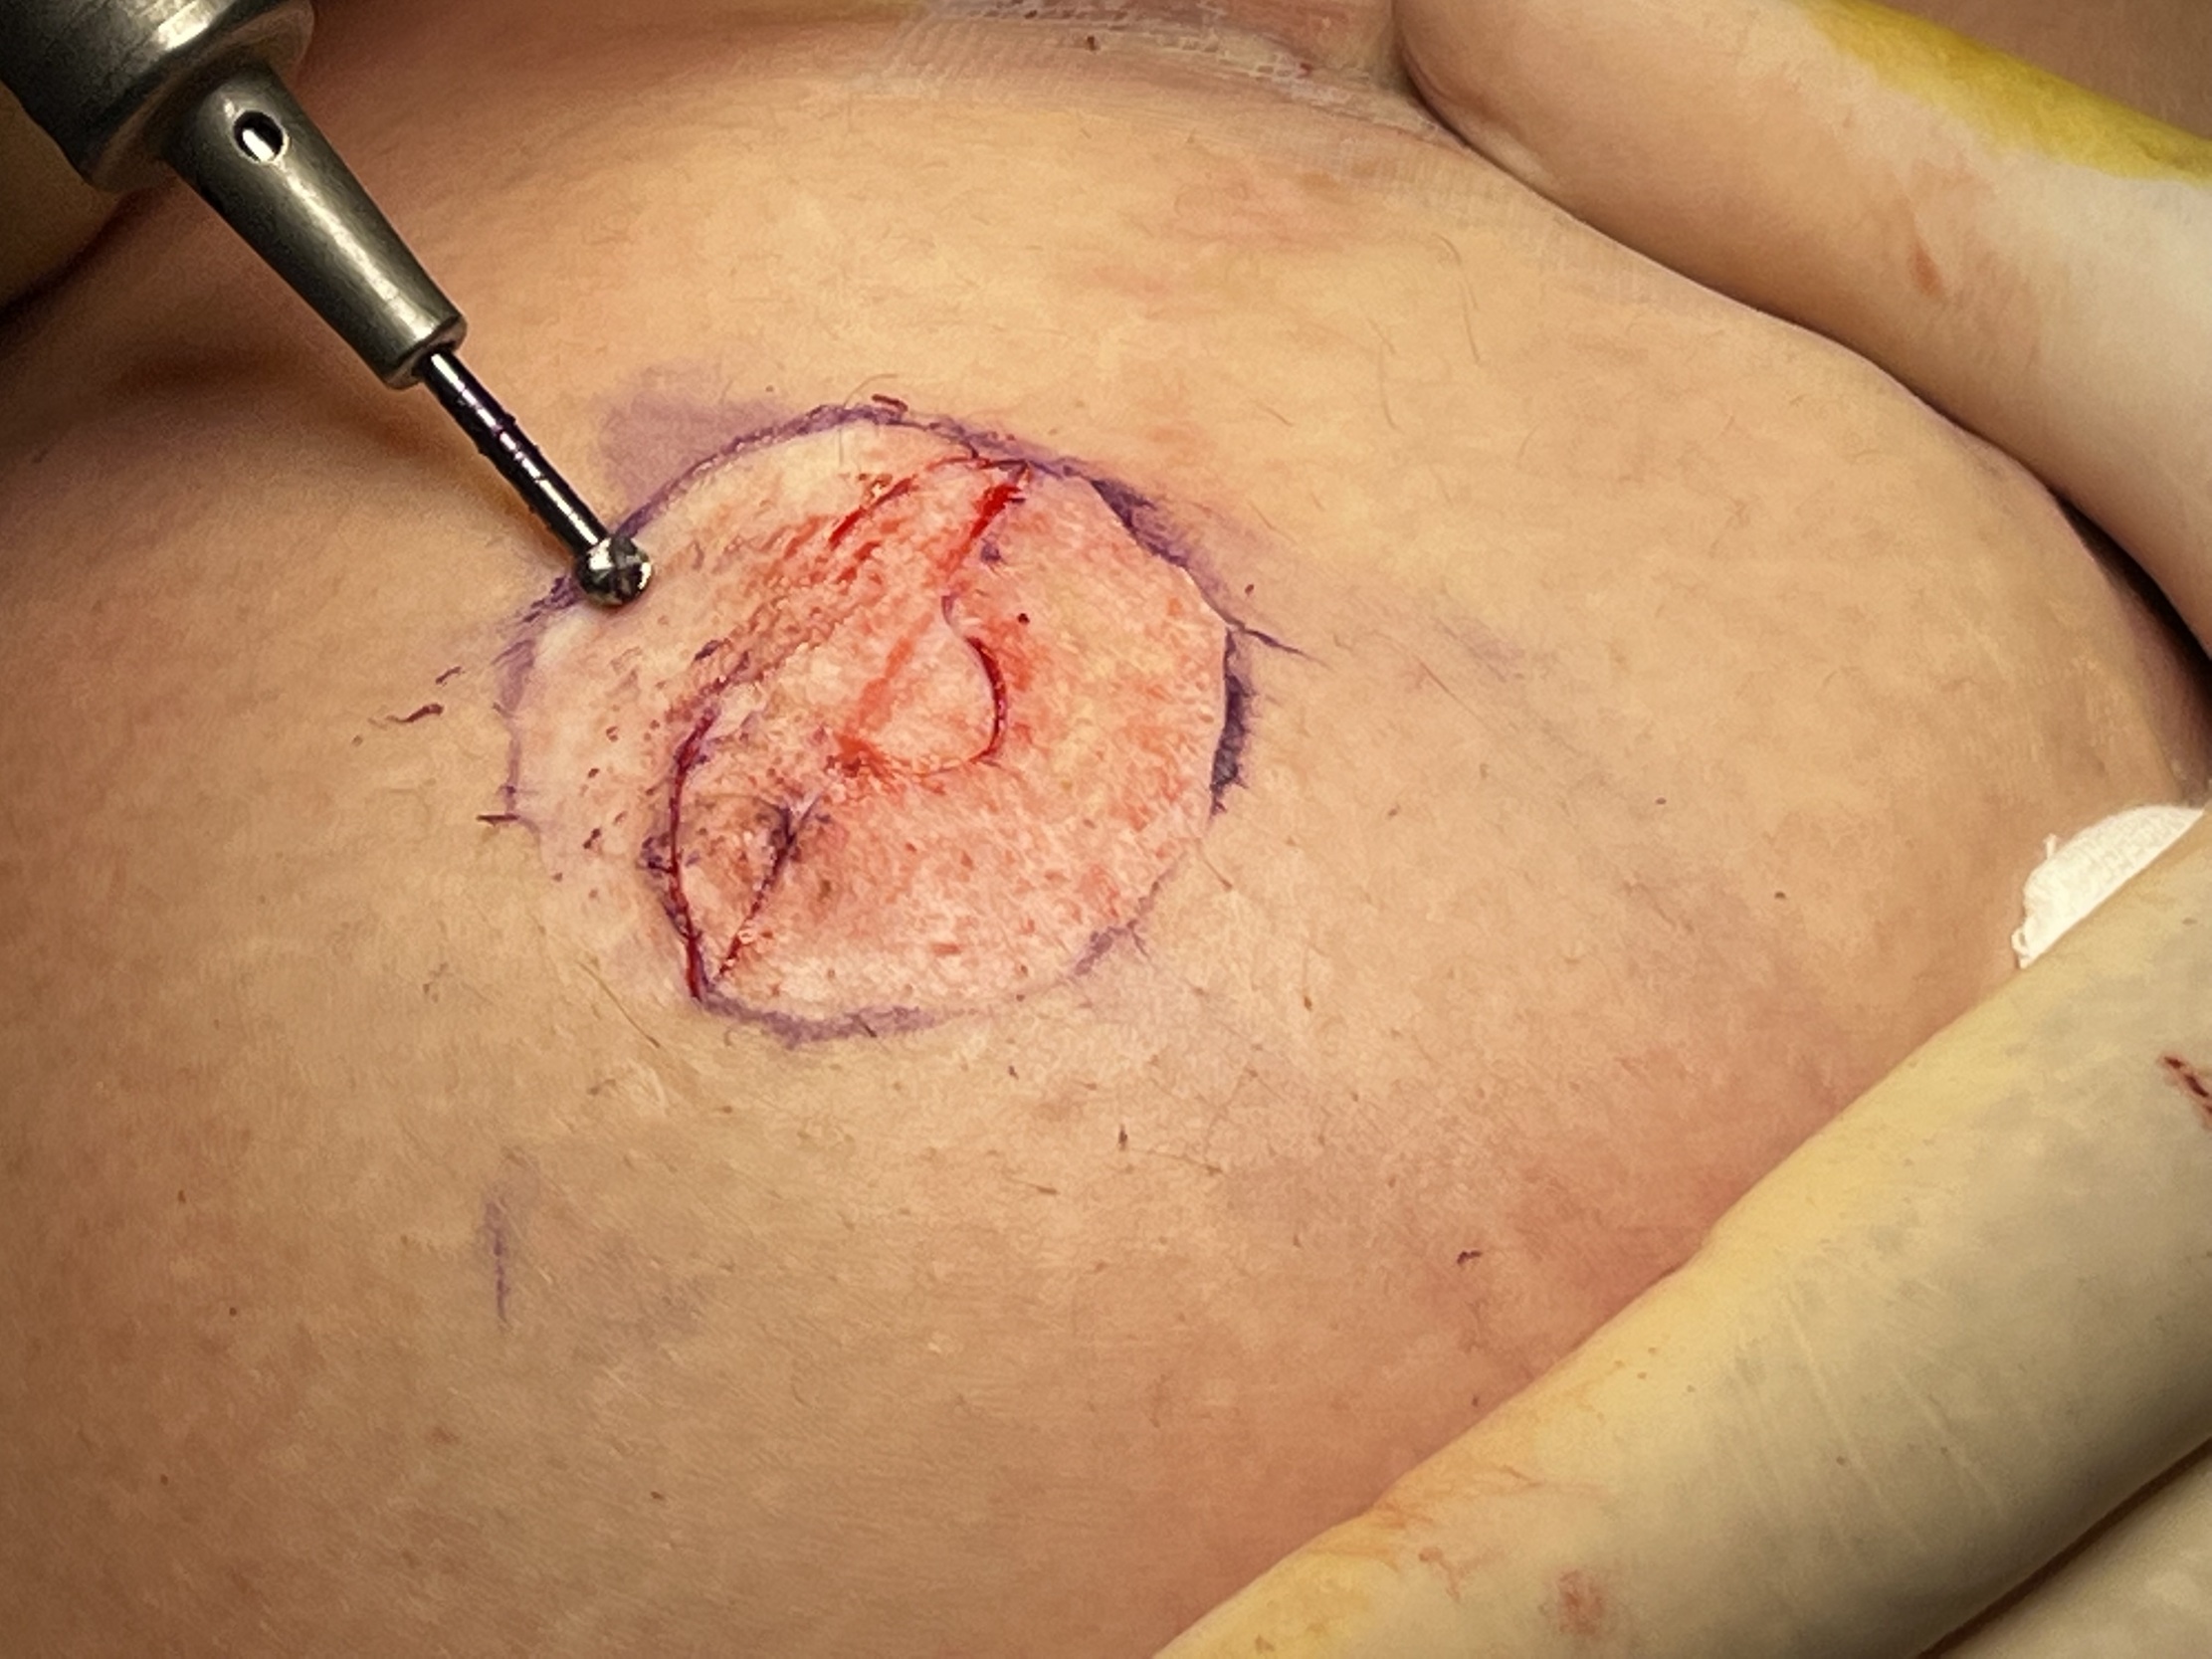
Step 1
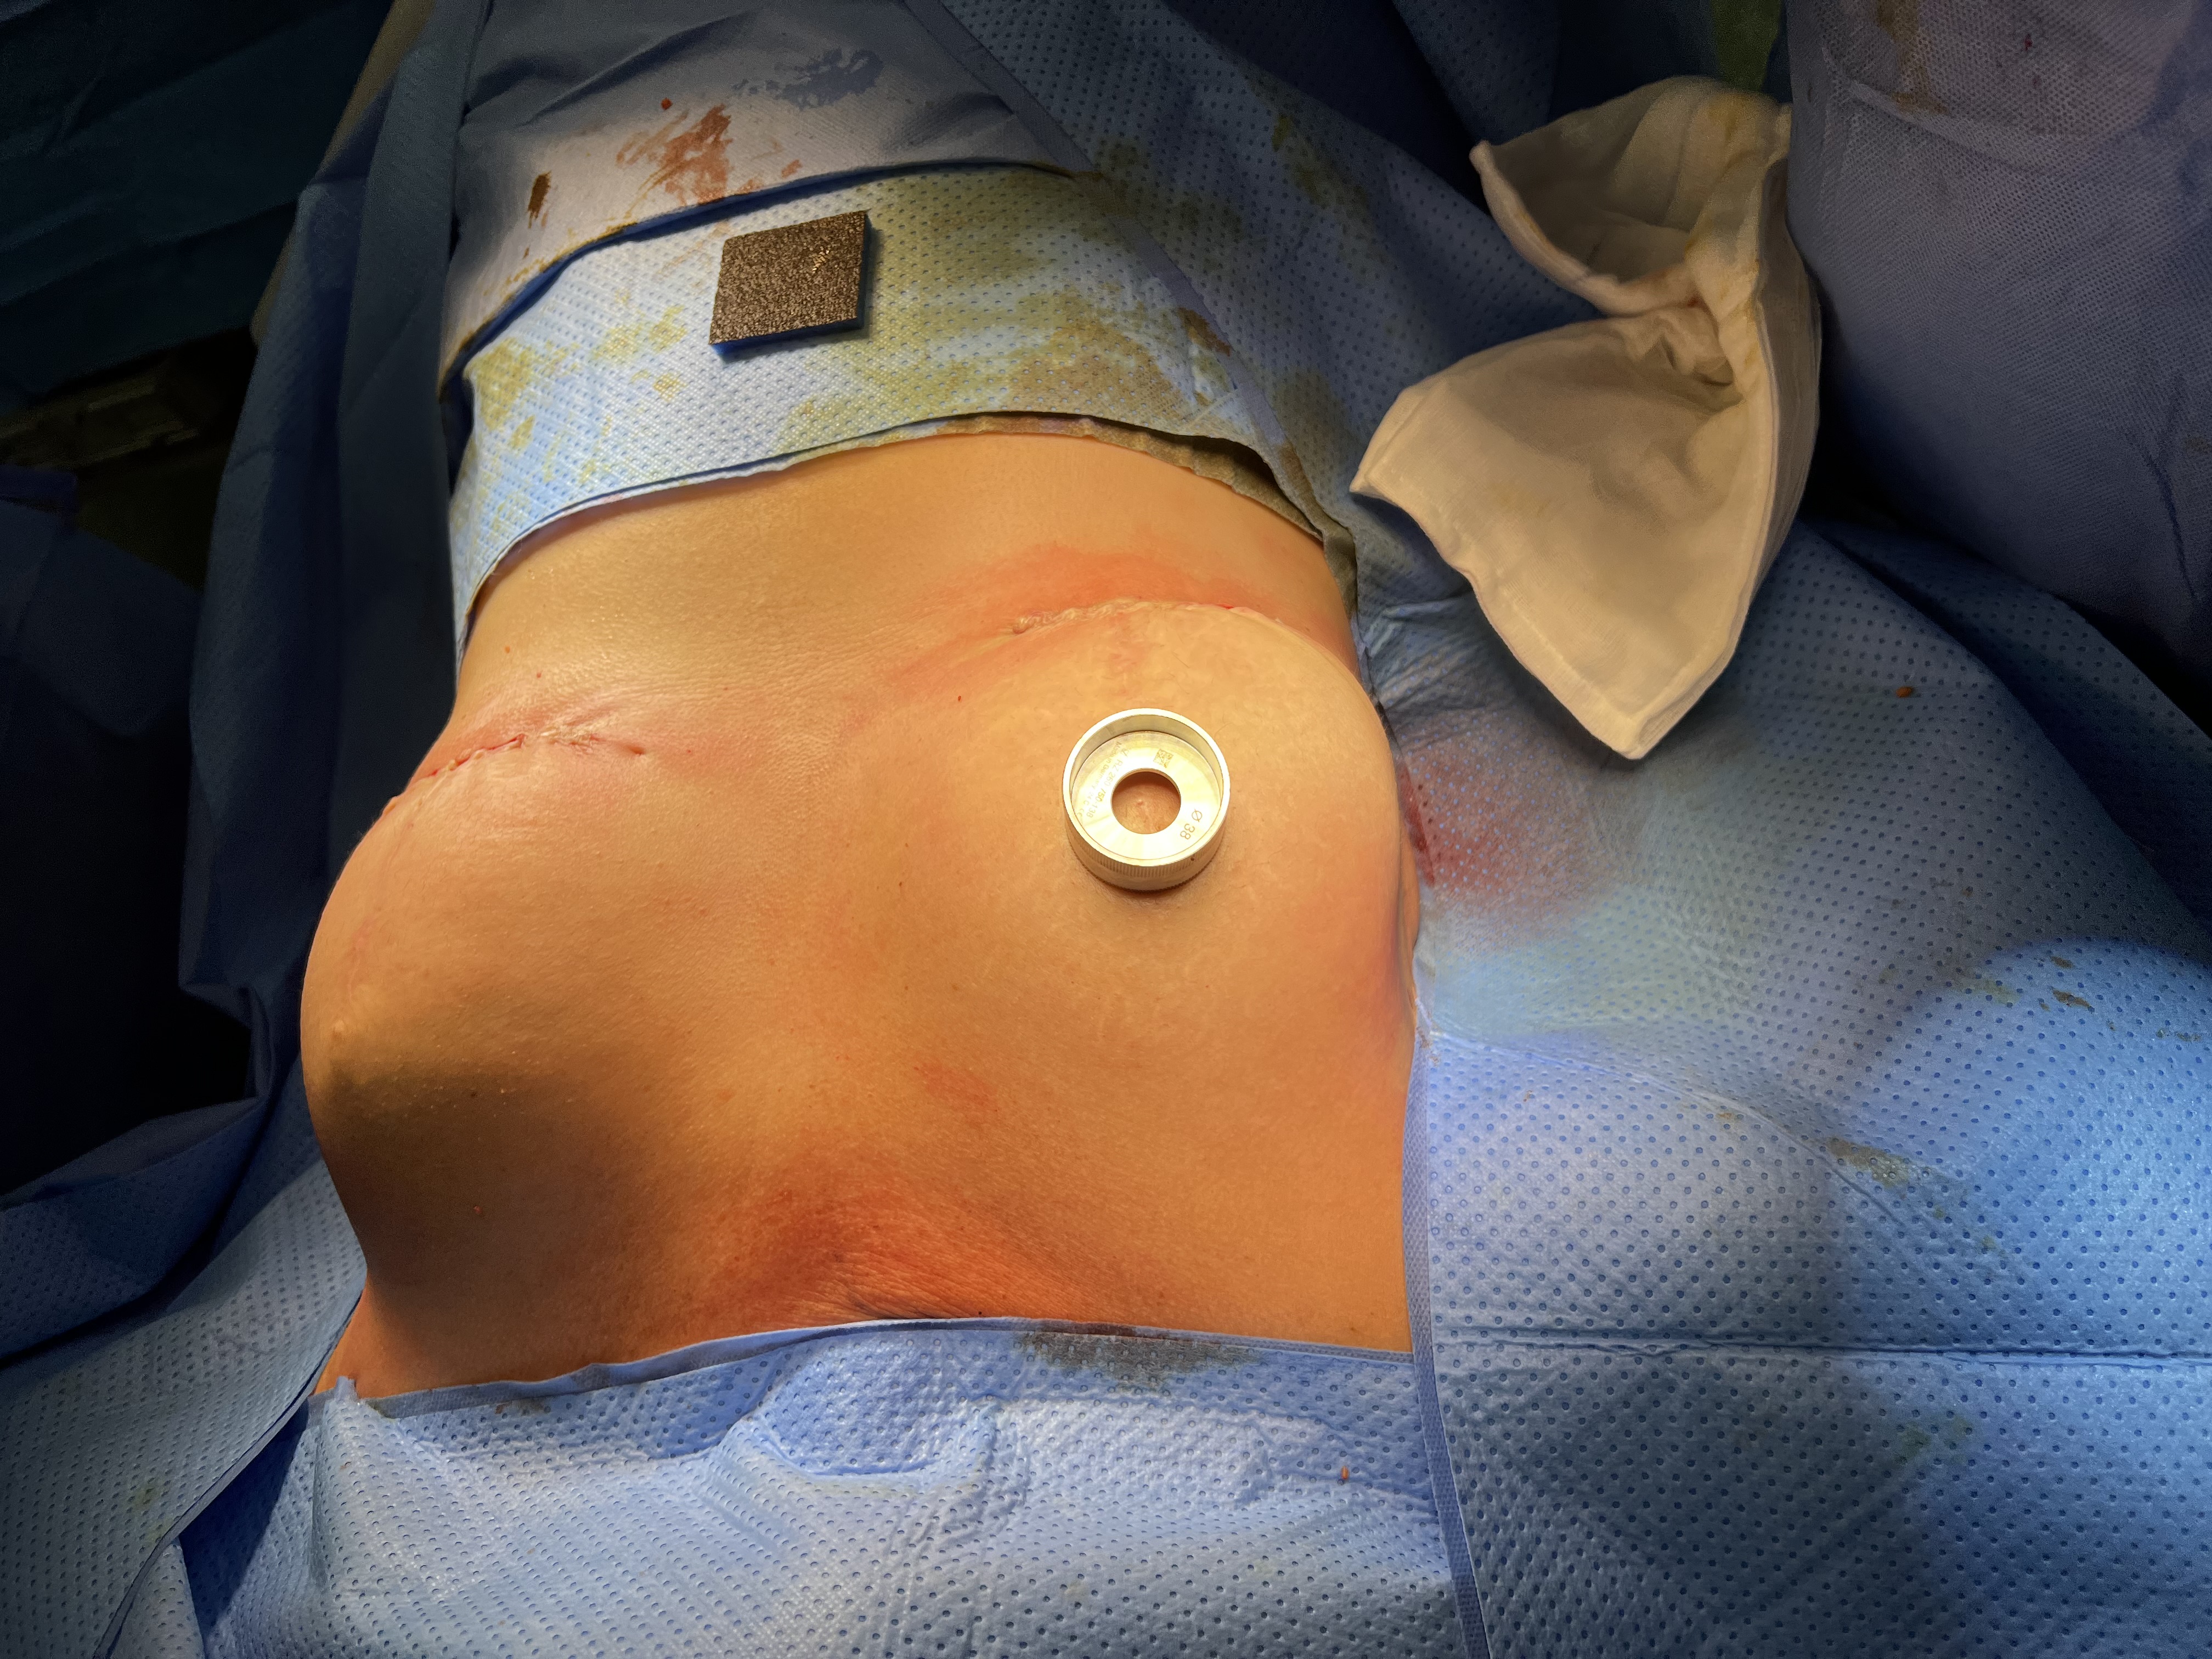
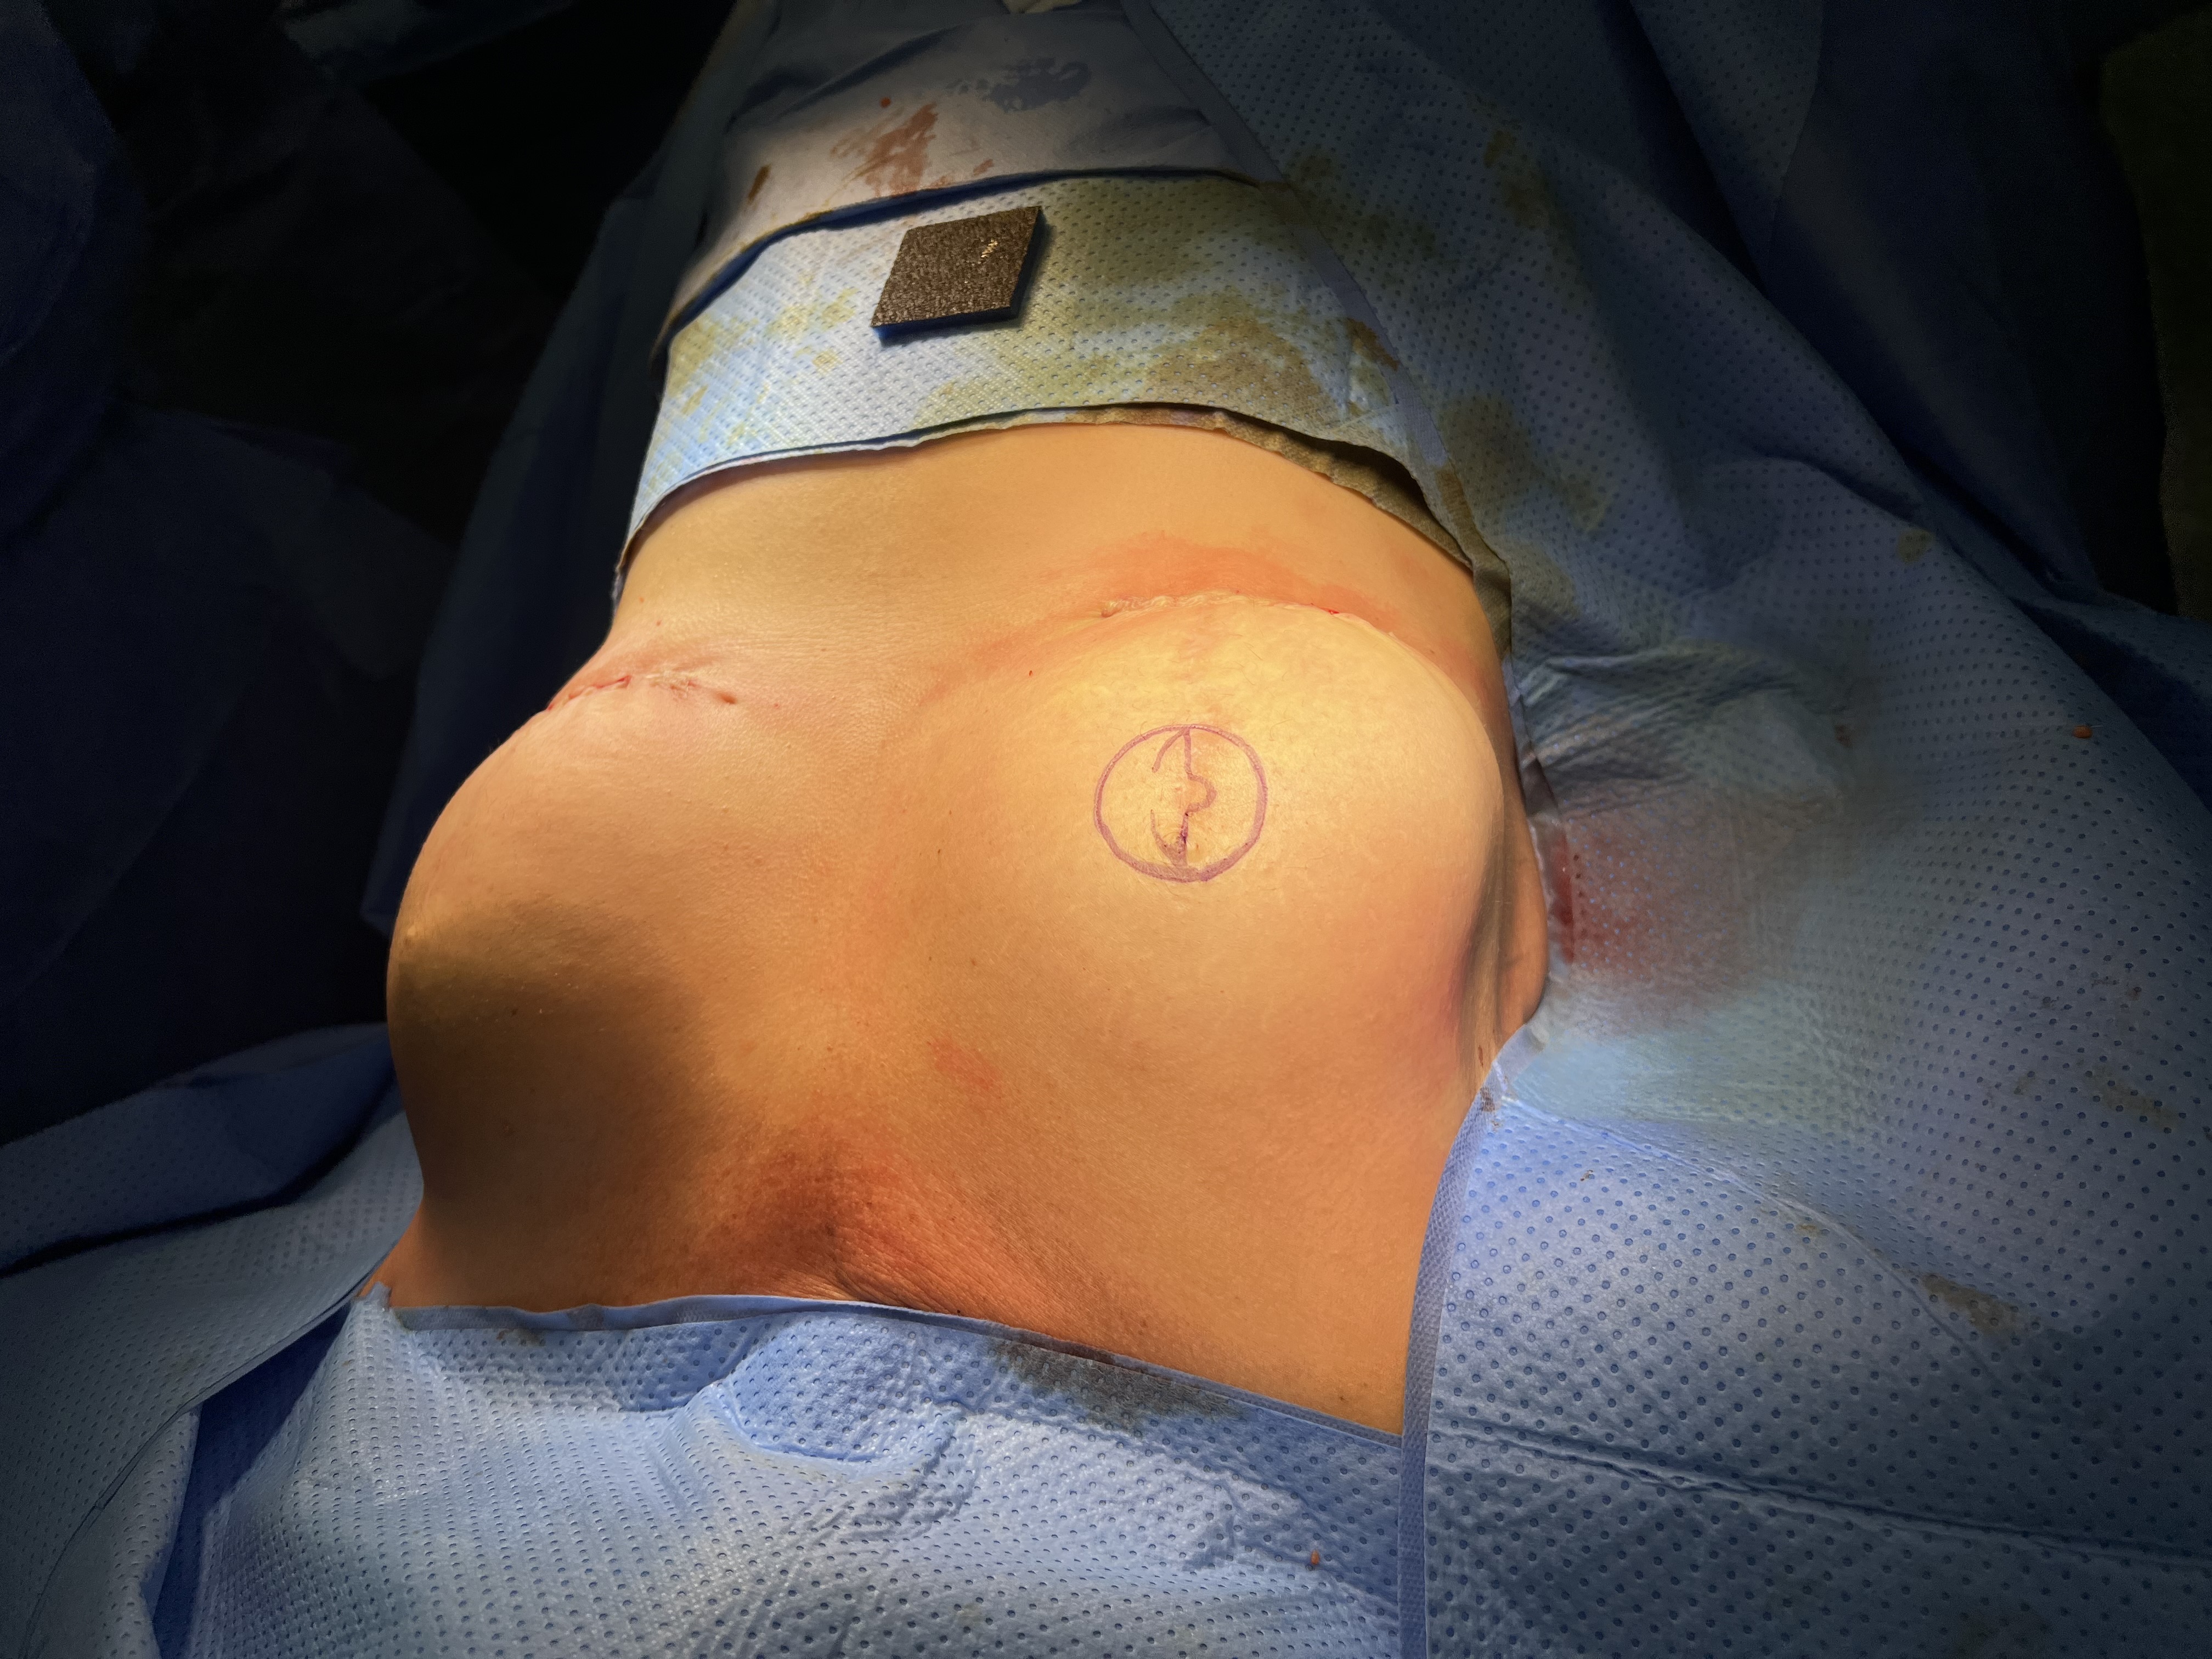
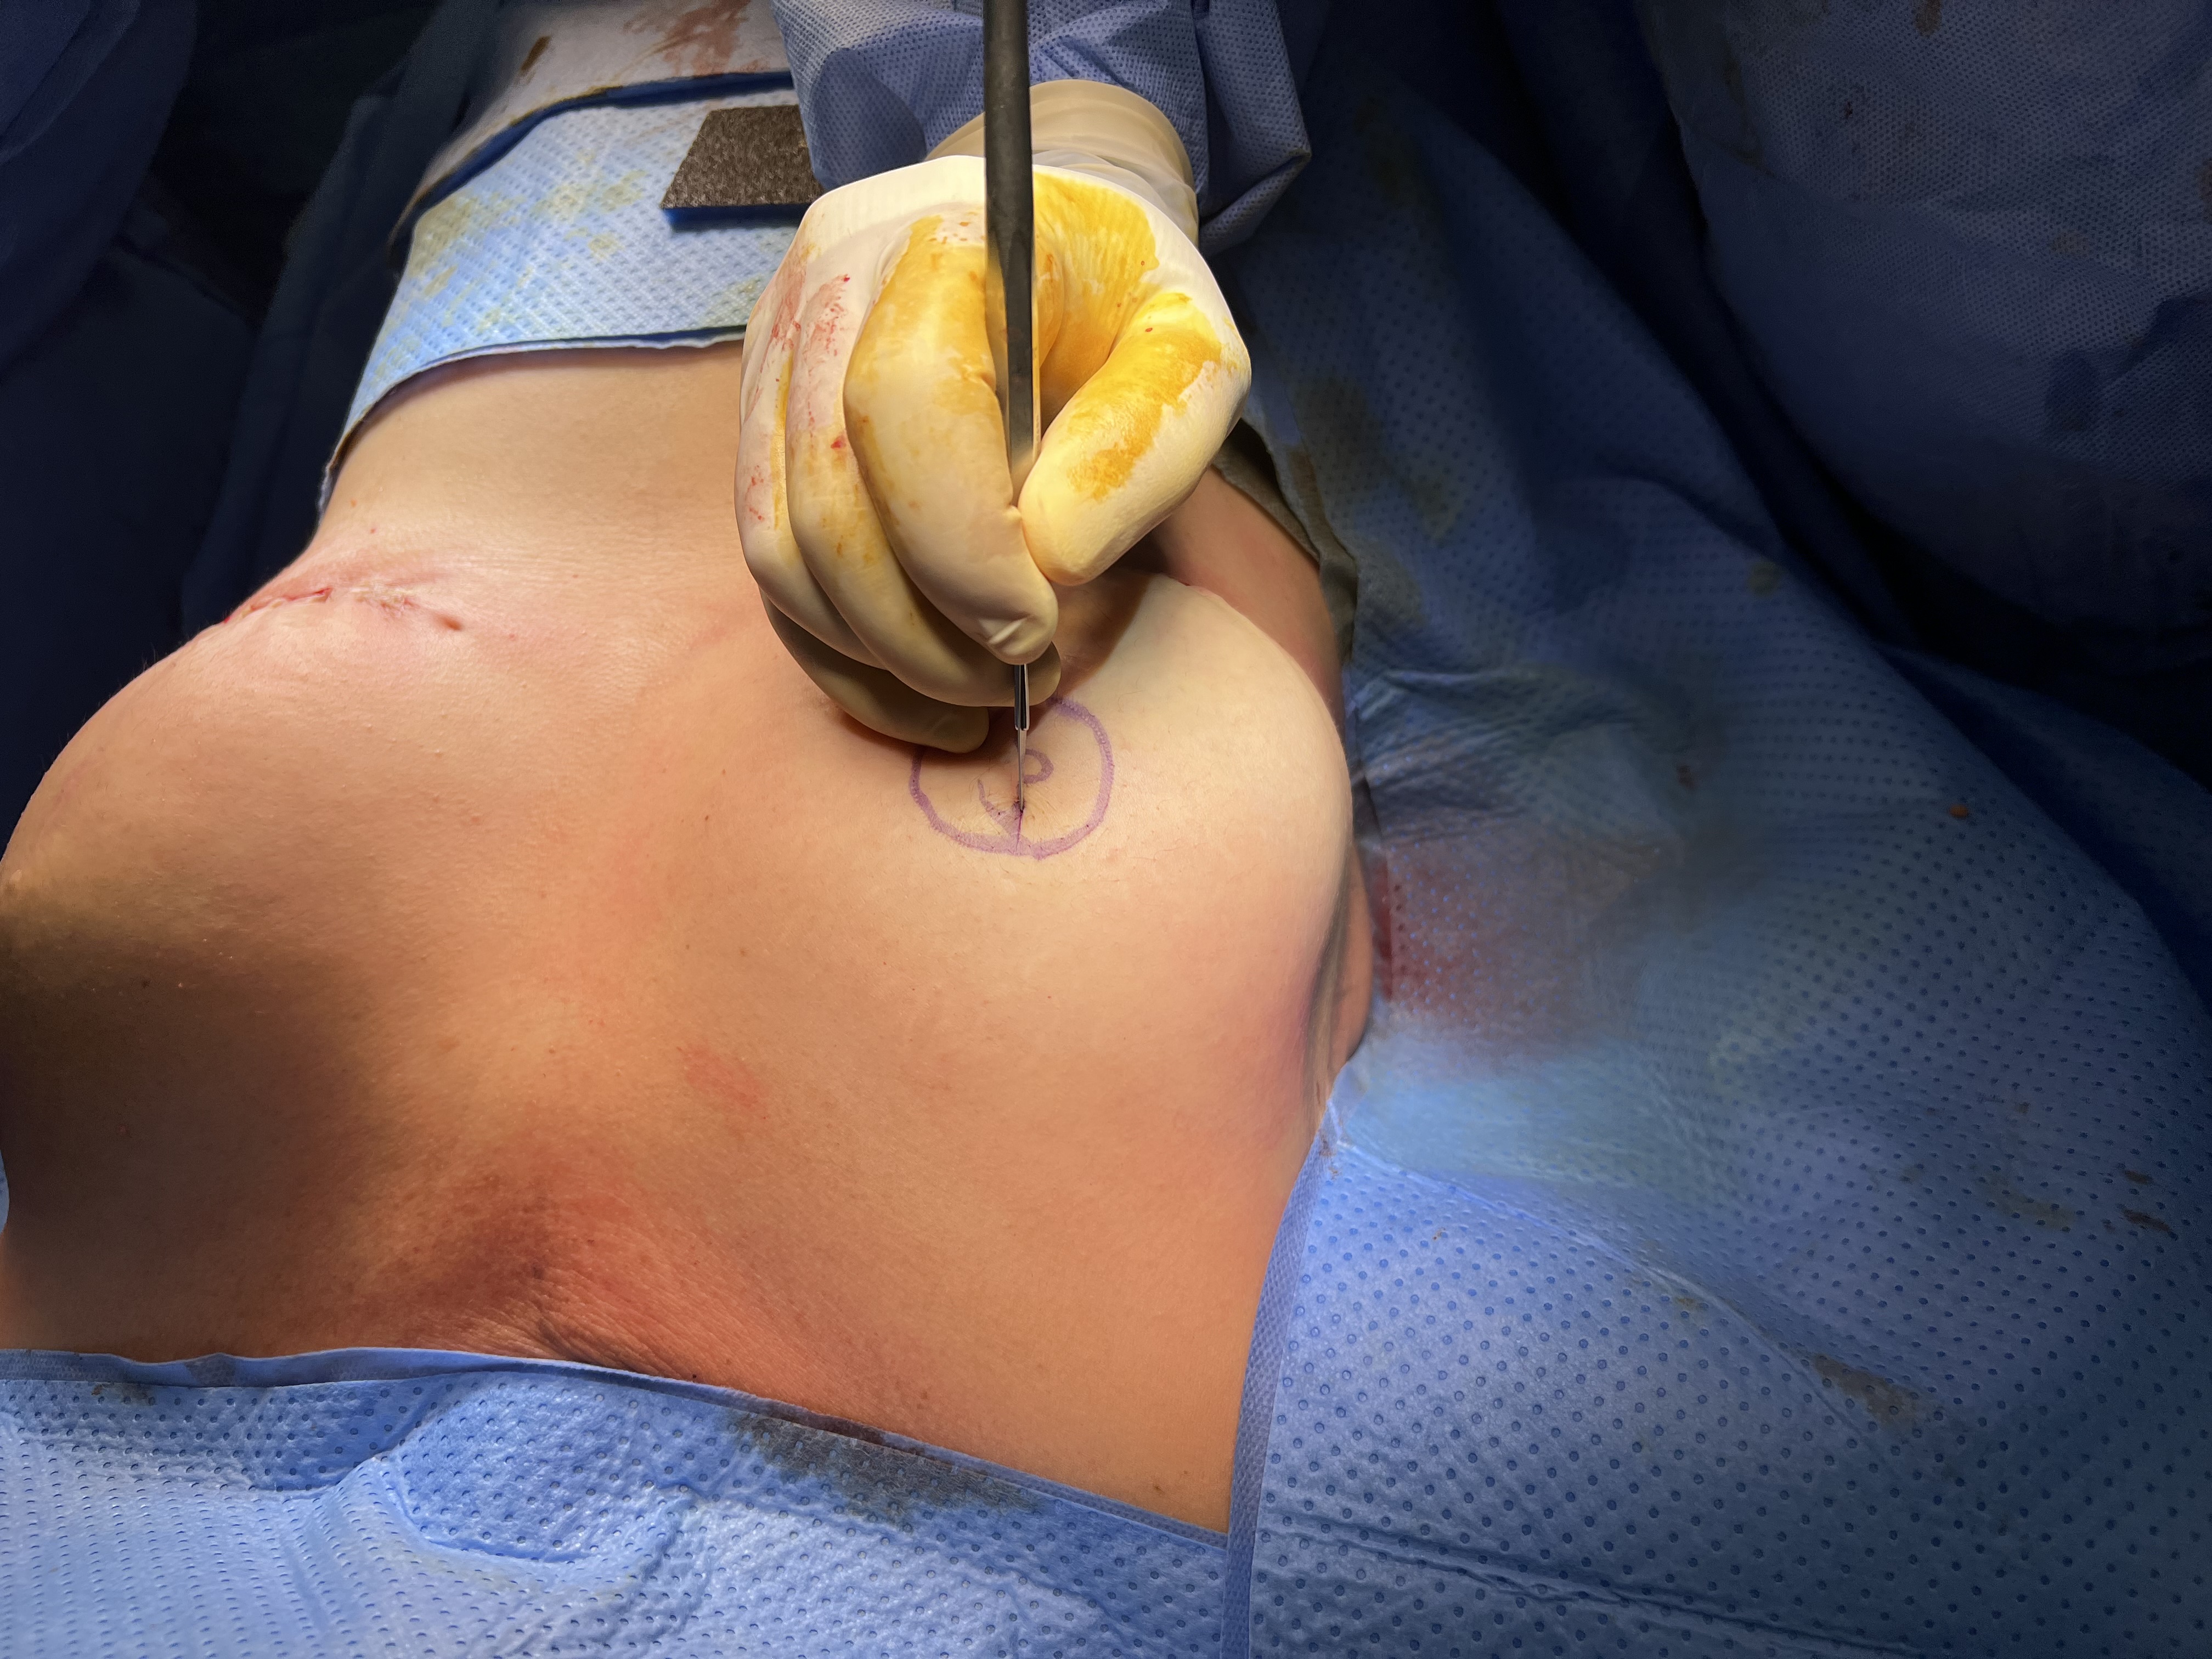
We mark out what will become the areola with a 42 mm nipple marker and, within it, the C-V flap (figures 1 and 2). Gently score the edges of the areola and the flap with a number 11 blade, breaching the epidermis (Figure 3). You will need this to maintain your markings after the next step.


Step 2
Using the burr, we perform dermabrasion of the entire marked area, including over the scratched-out flaps, so that deep dermis is visible with punctate bleeding (figures 4–6).
.jpg)
.jpg)
Step 3
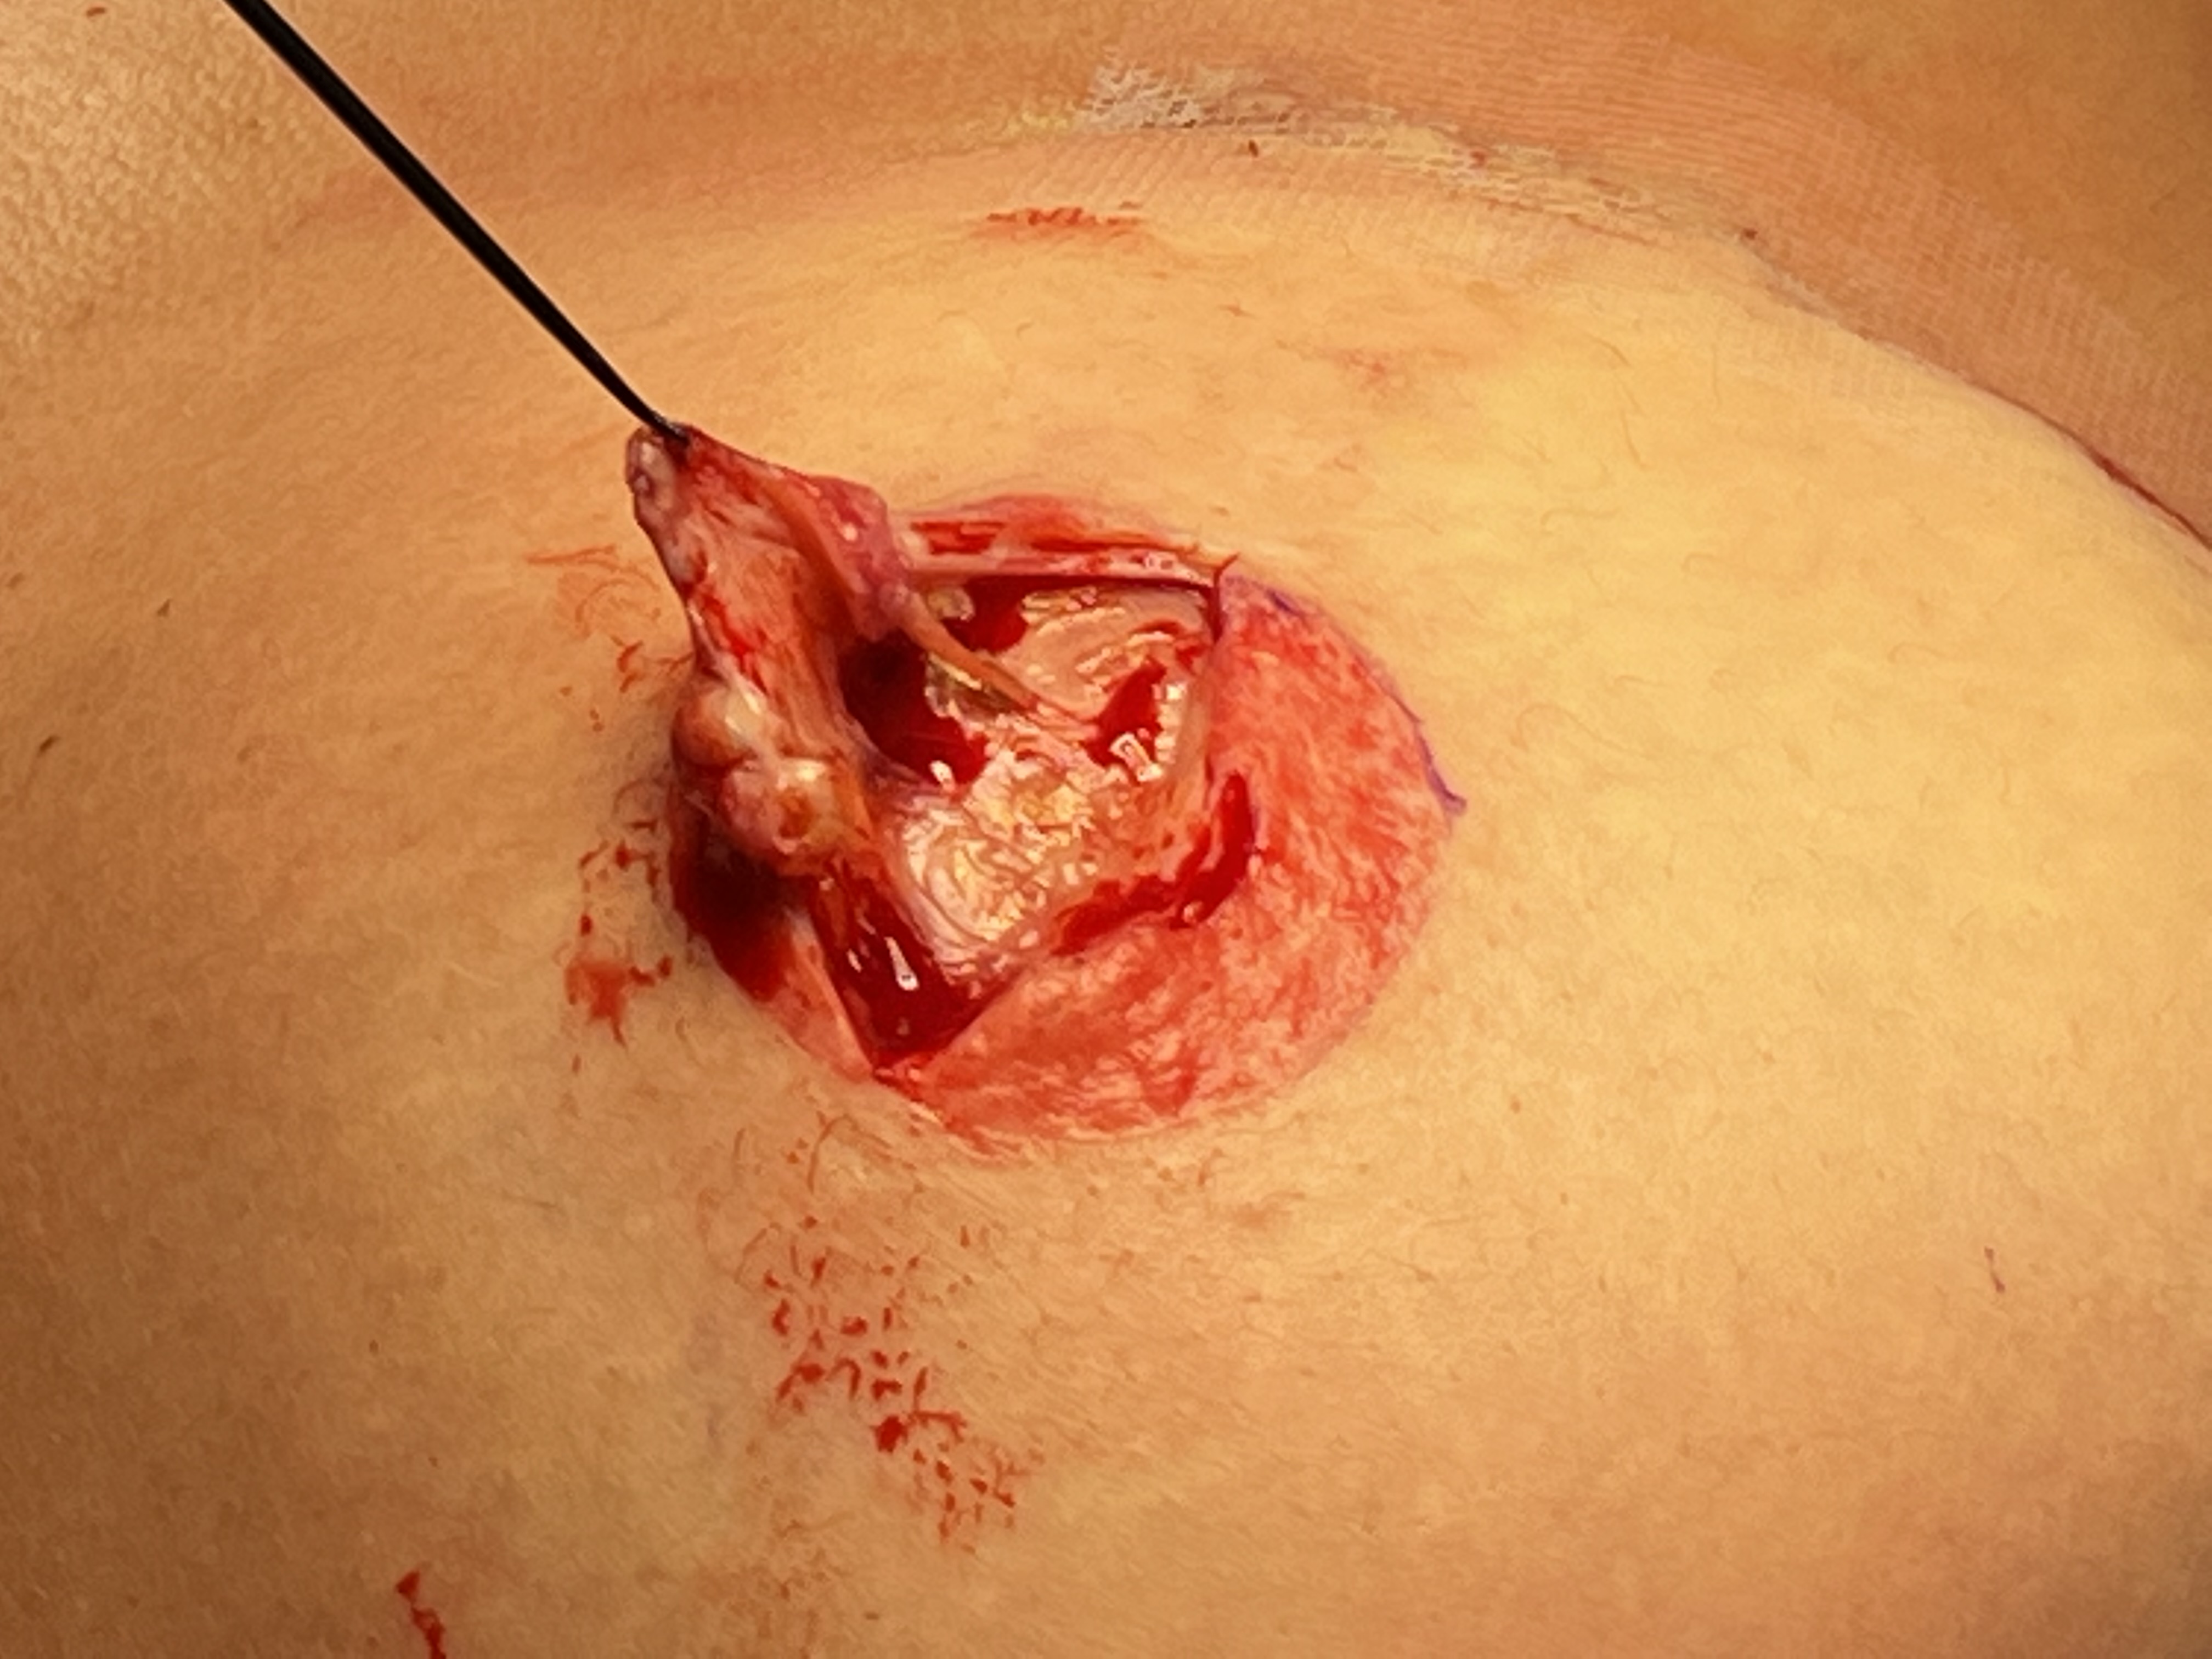
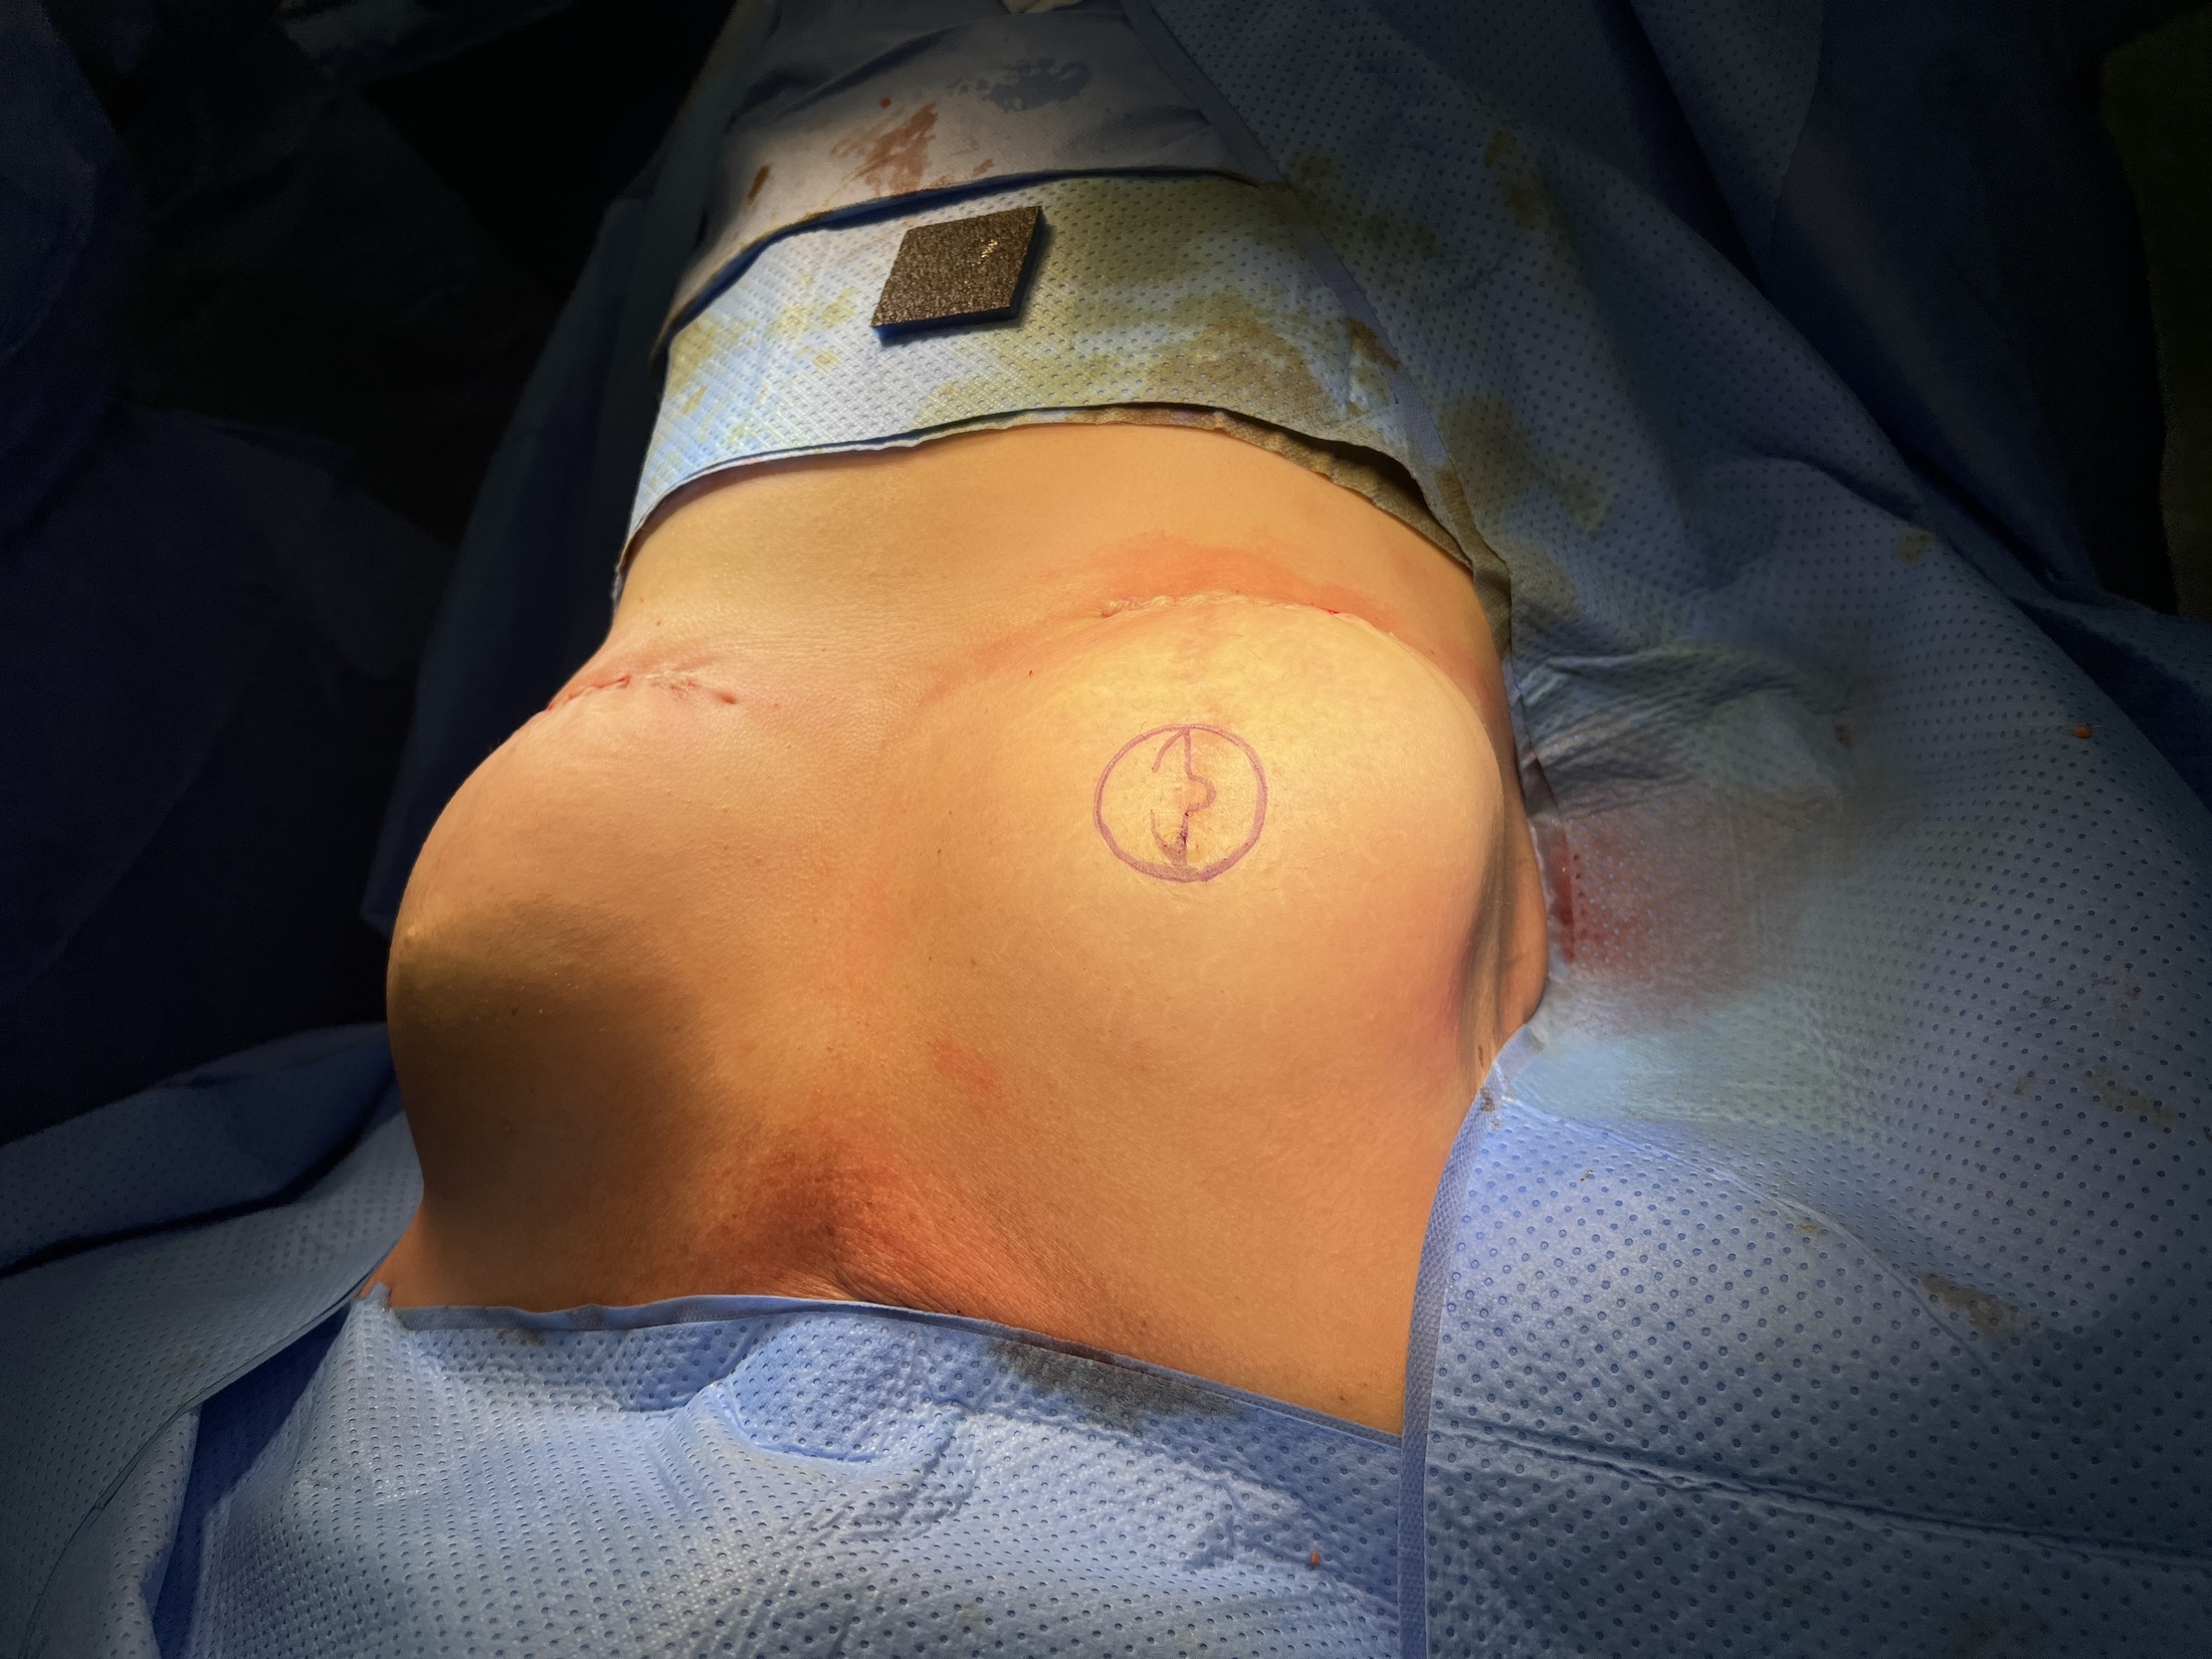
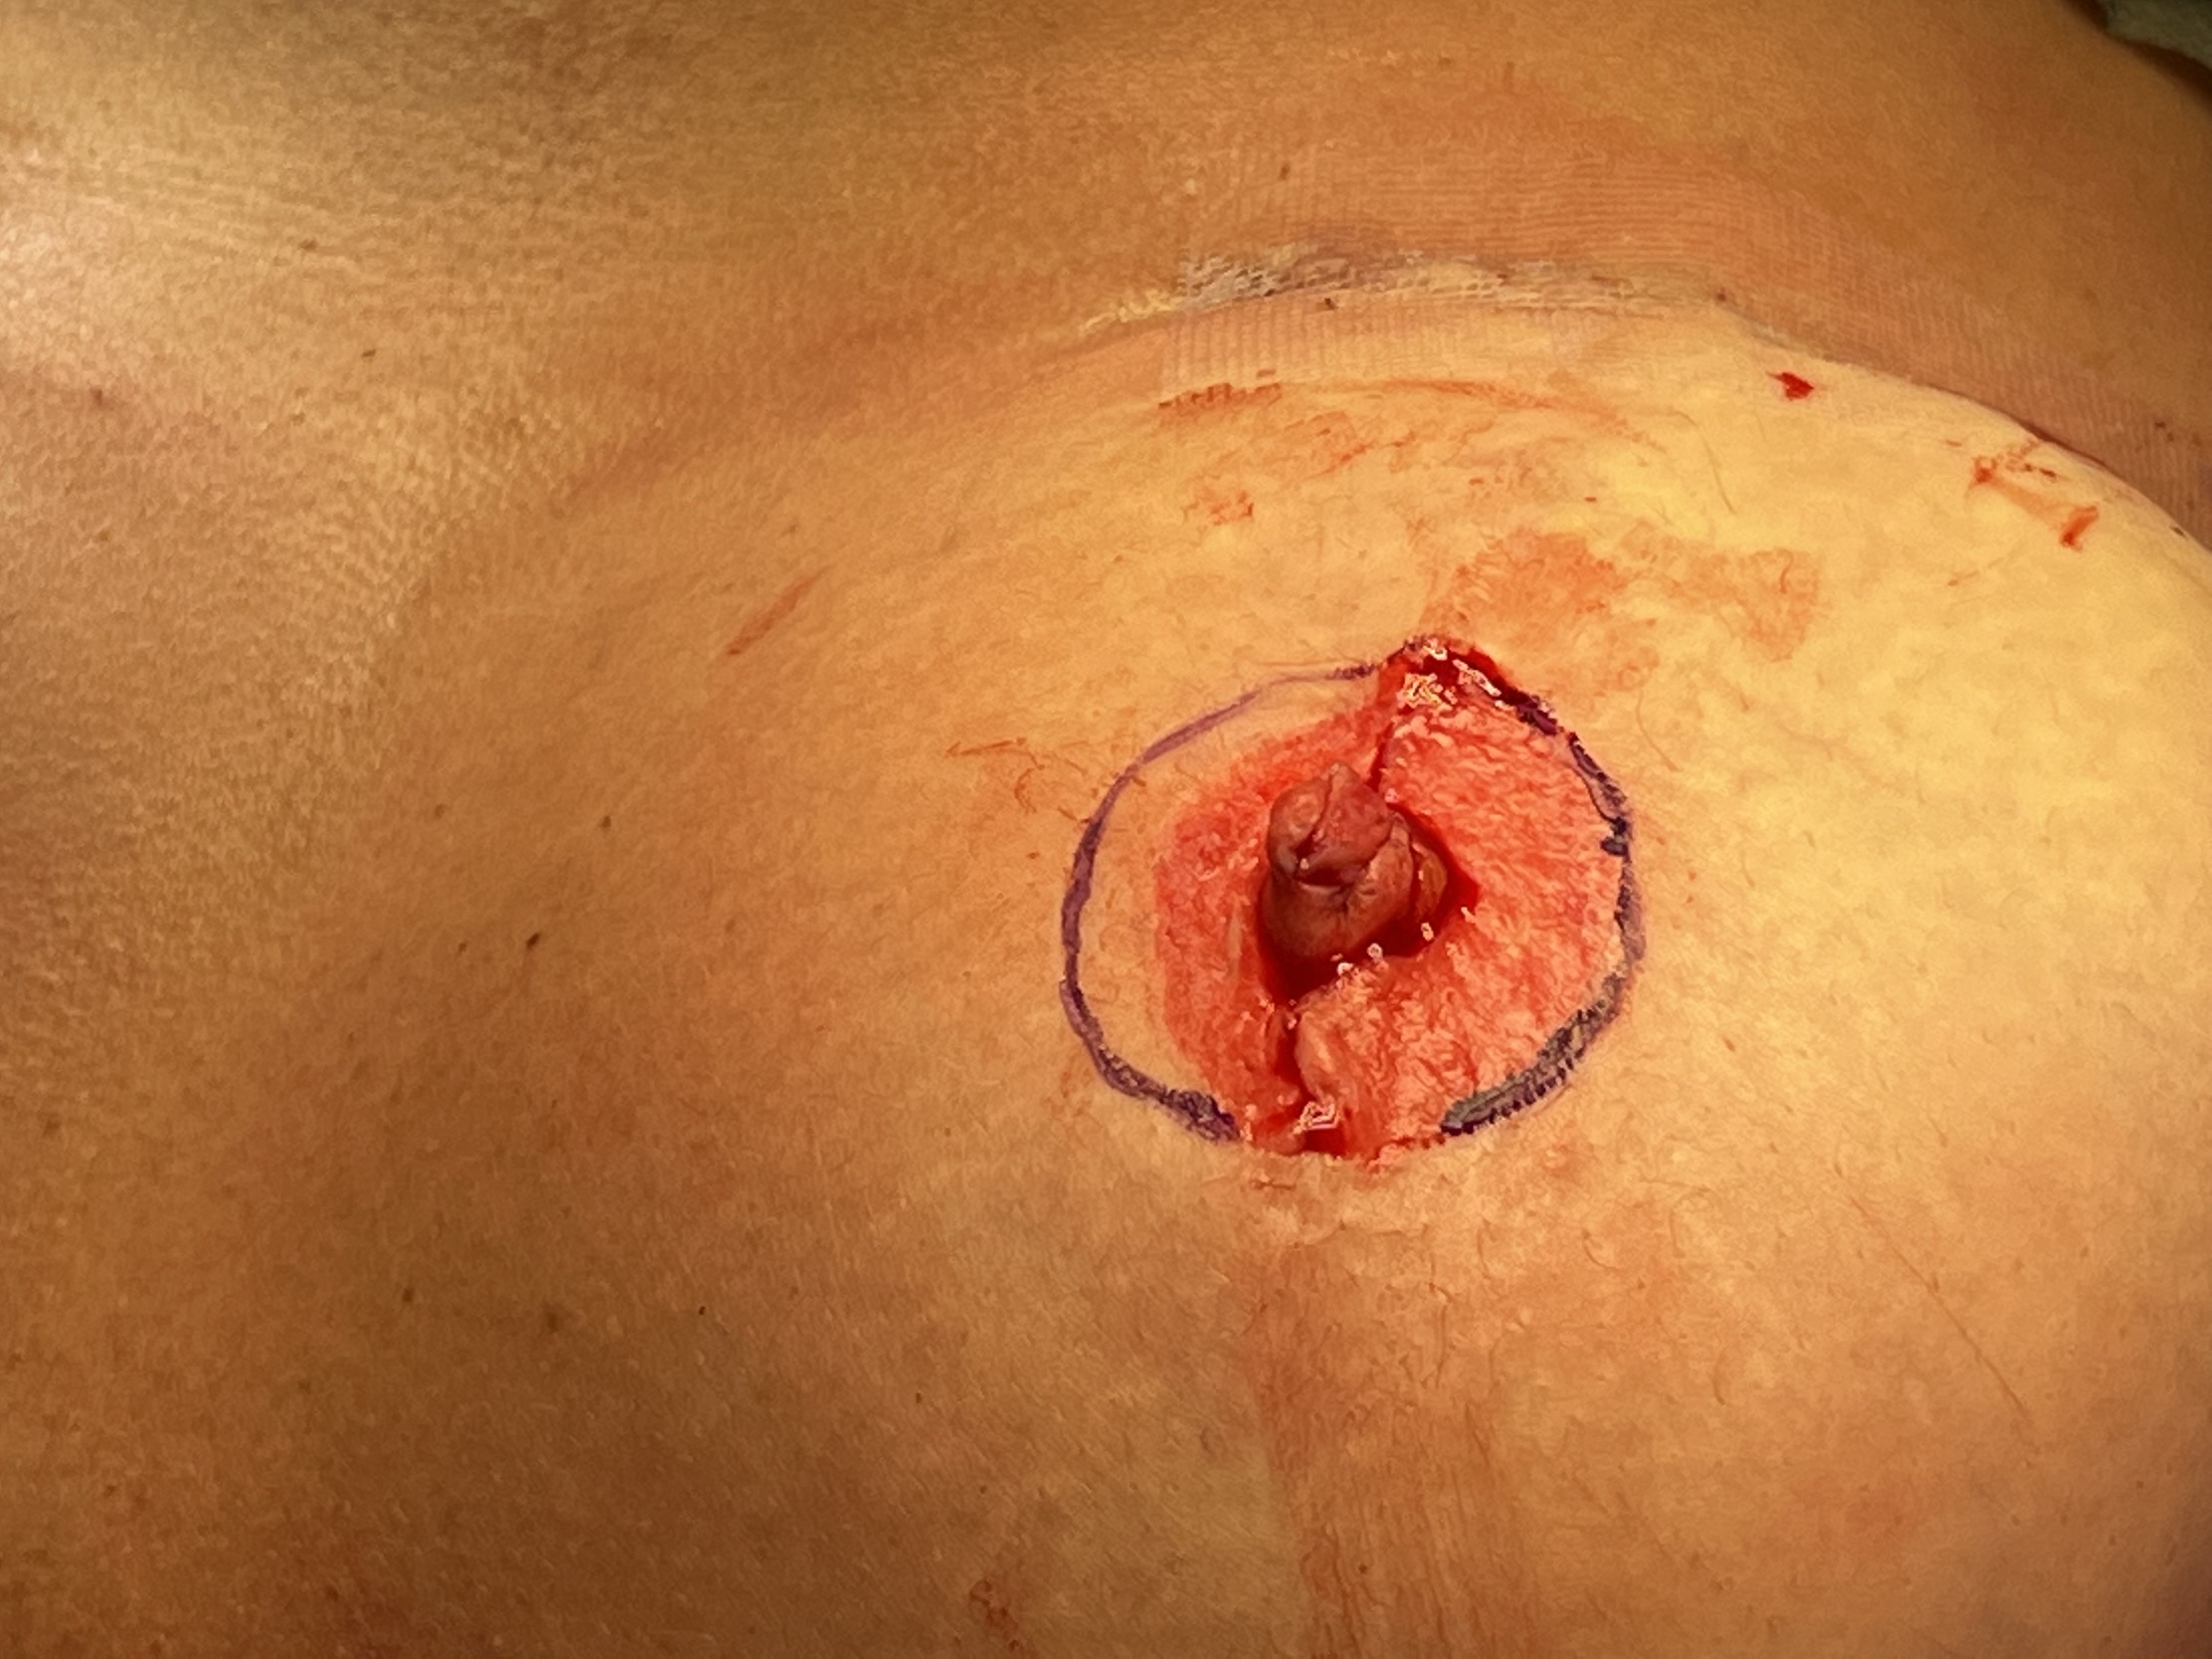
The flap reconstruction of the projecting nipple is completed using the modified C-V flap as normal using 4–0 Monocryl® (Ethicon—poliglecaprone 25/4–0)(figures 7–10). This results in distortion of the original 42 mm areola, so this is re-marked around the nipple construct (figures 11 and 12). We then perform dermabrasion of the outer area again to obtain a uniform circular areola. We then finish suturing with a 5–0 Vicryl Rapide® (Ethicon—polygalactin 910) (figures 13 and 14).
.jpg)
.jpg)


.jpg)
Step 4
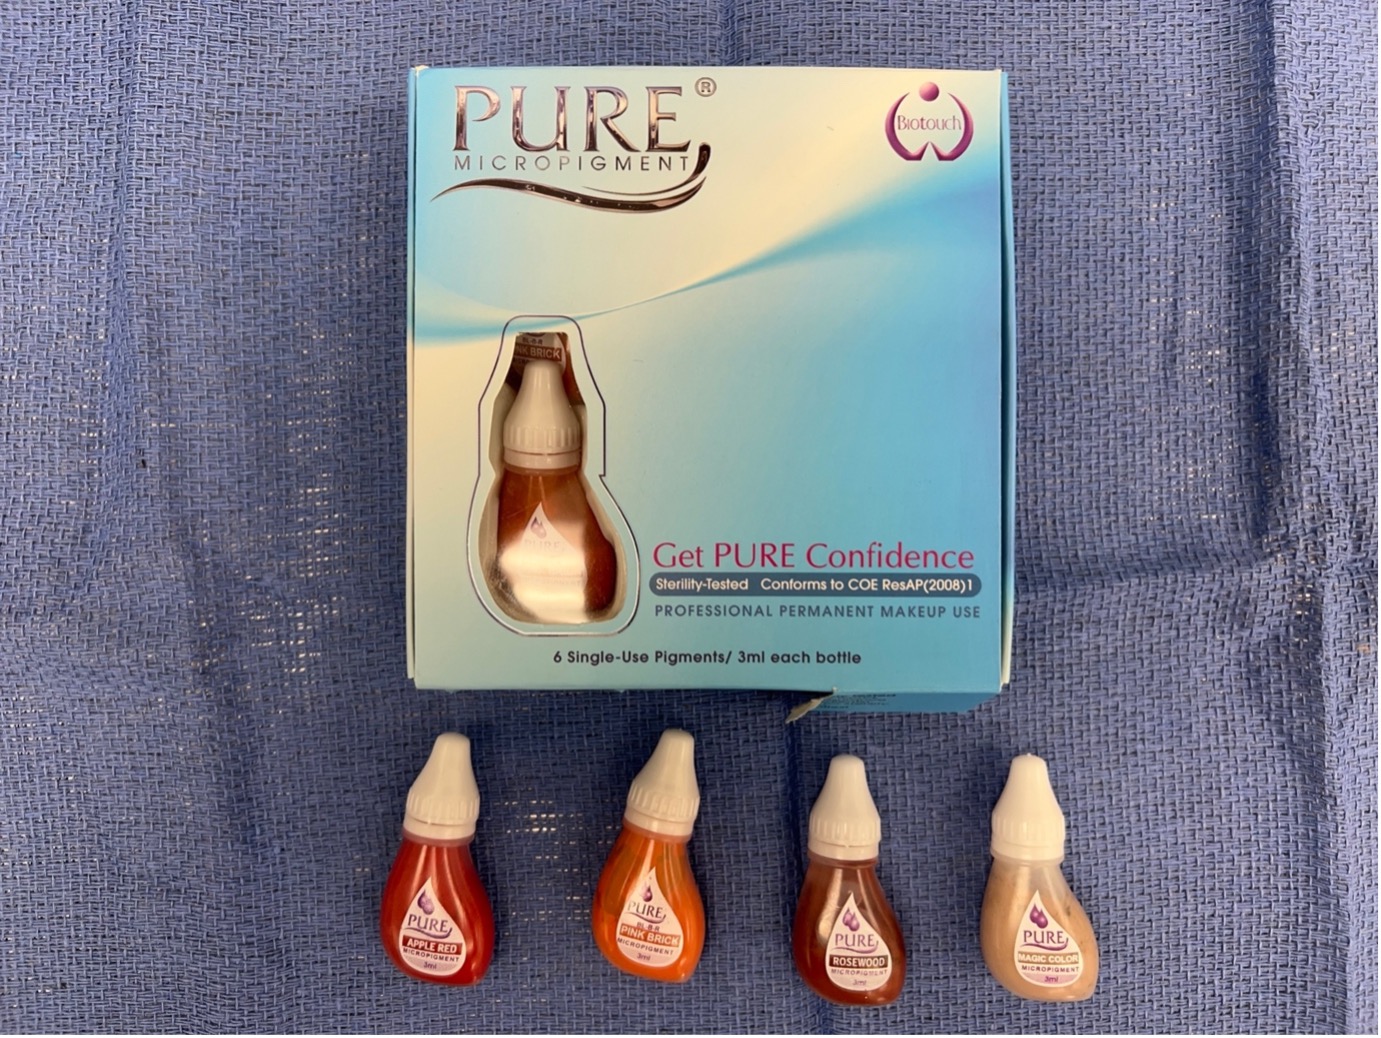
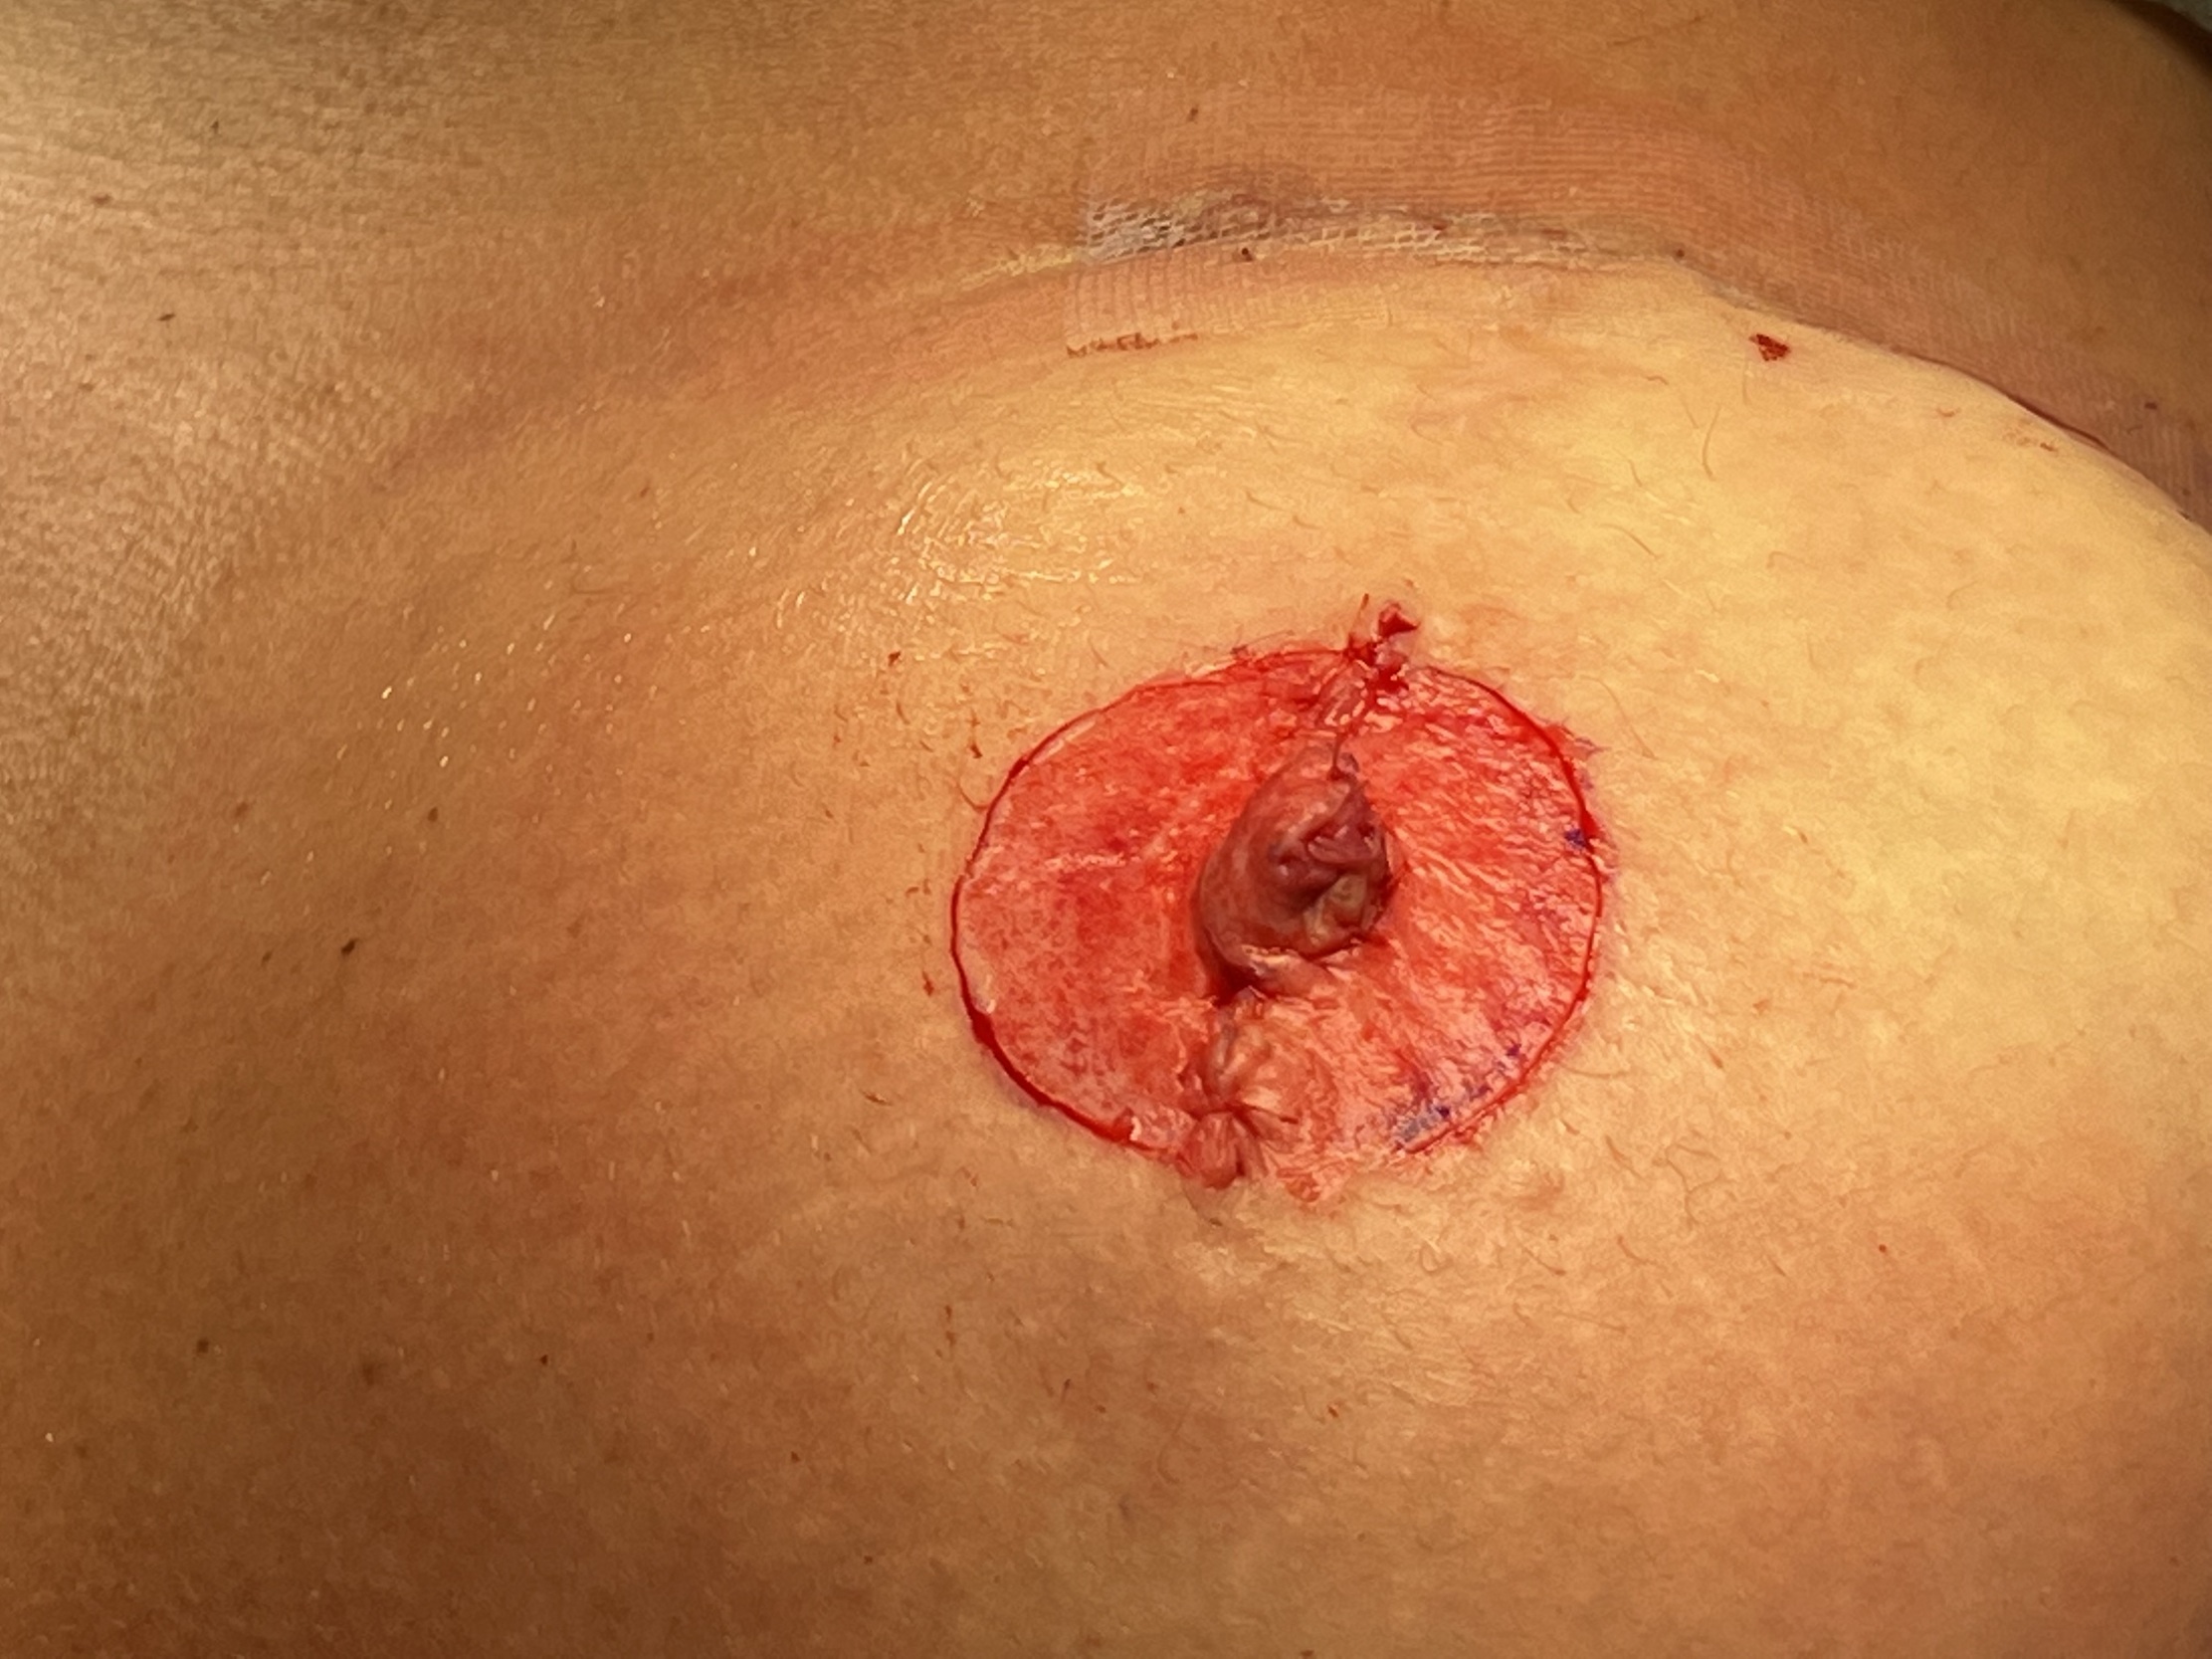
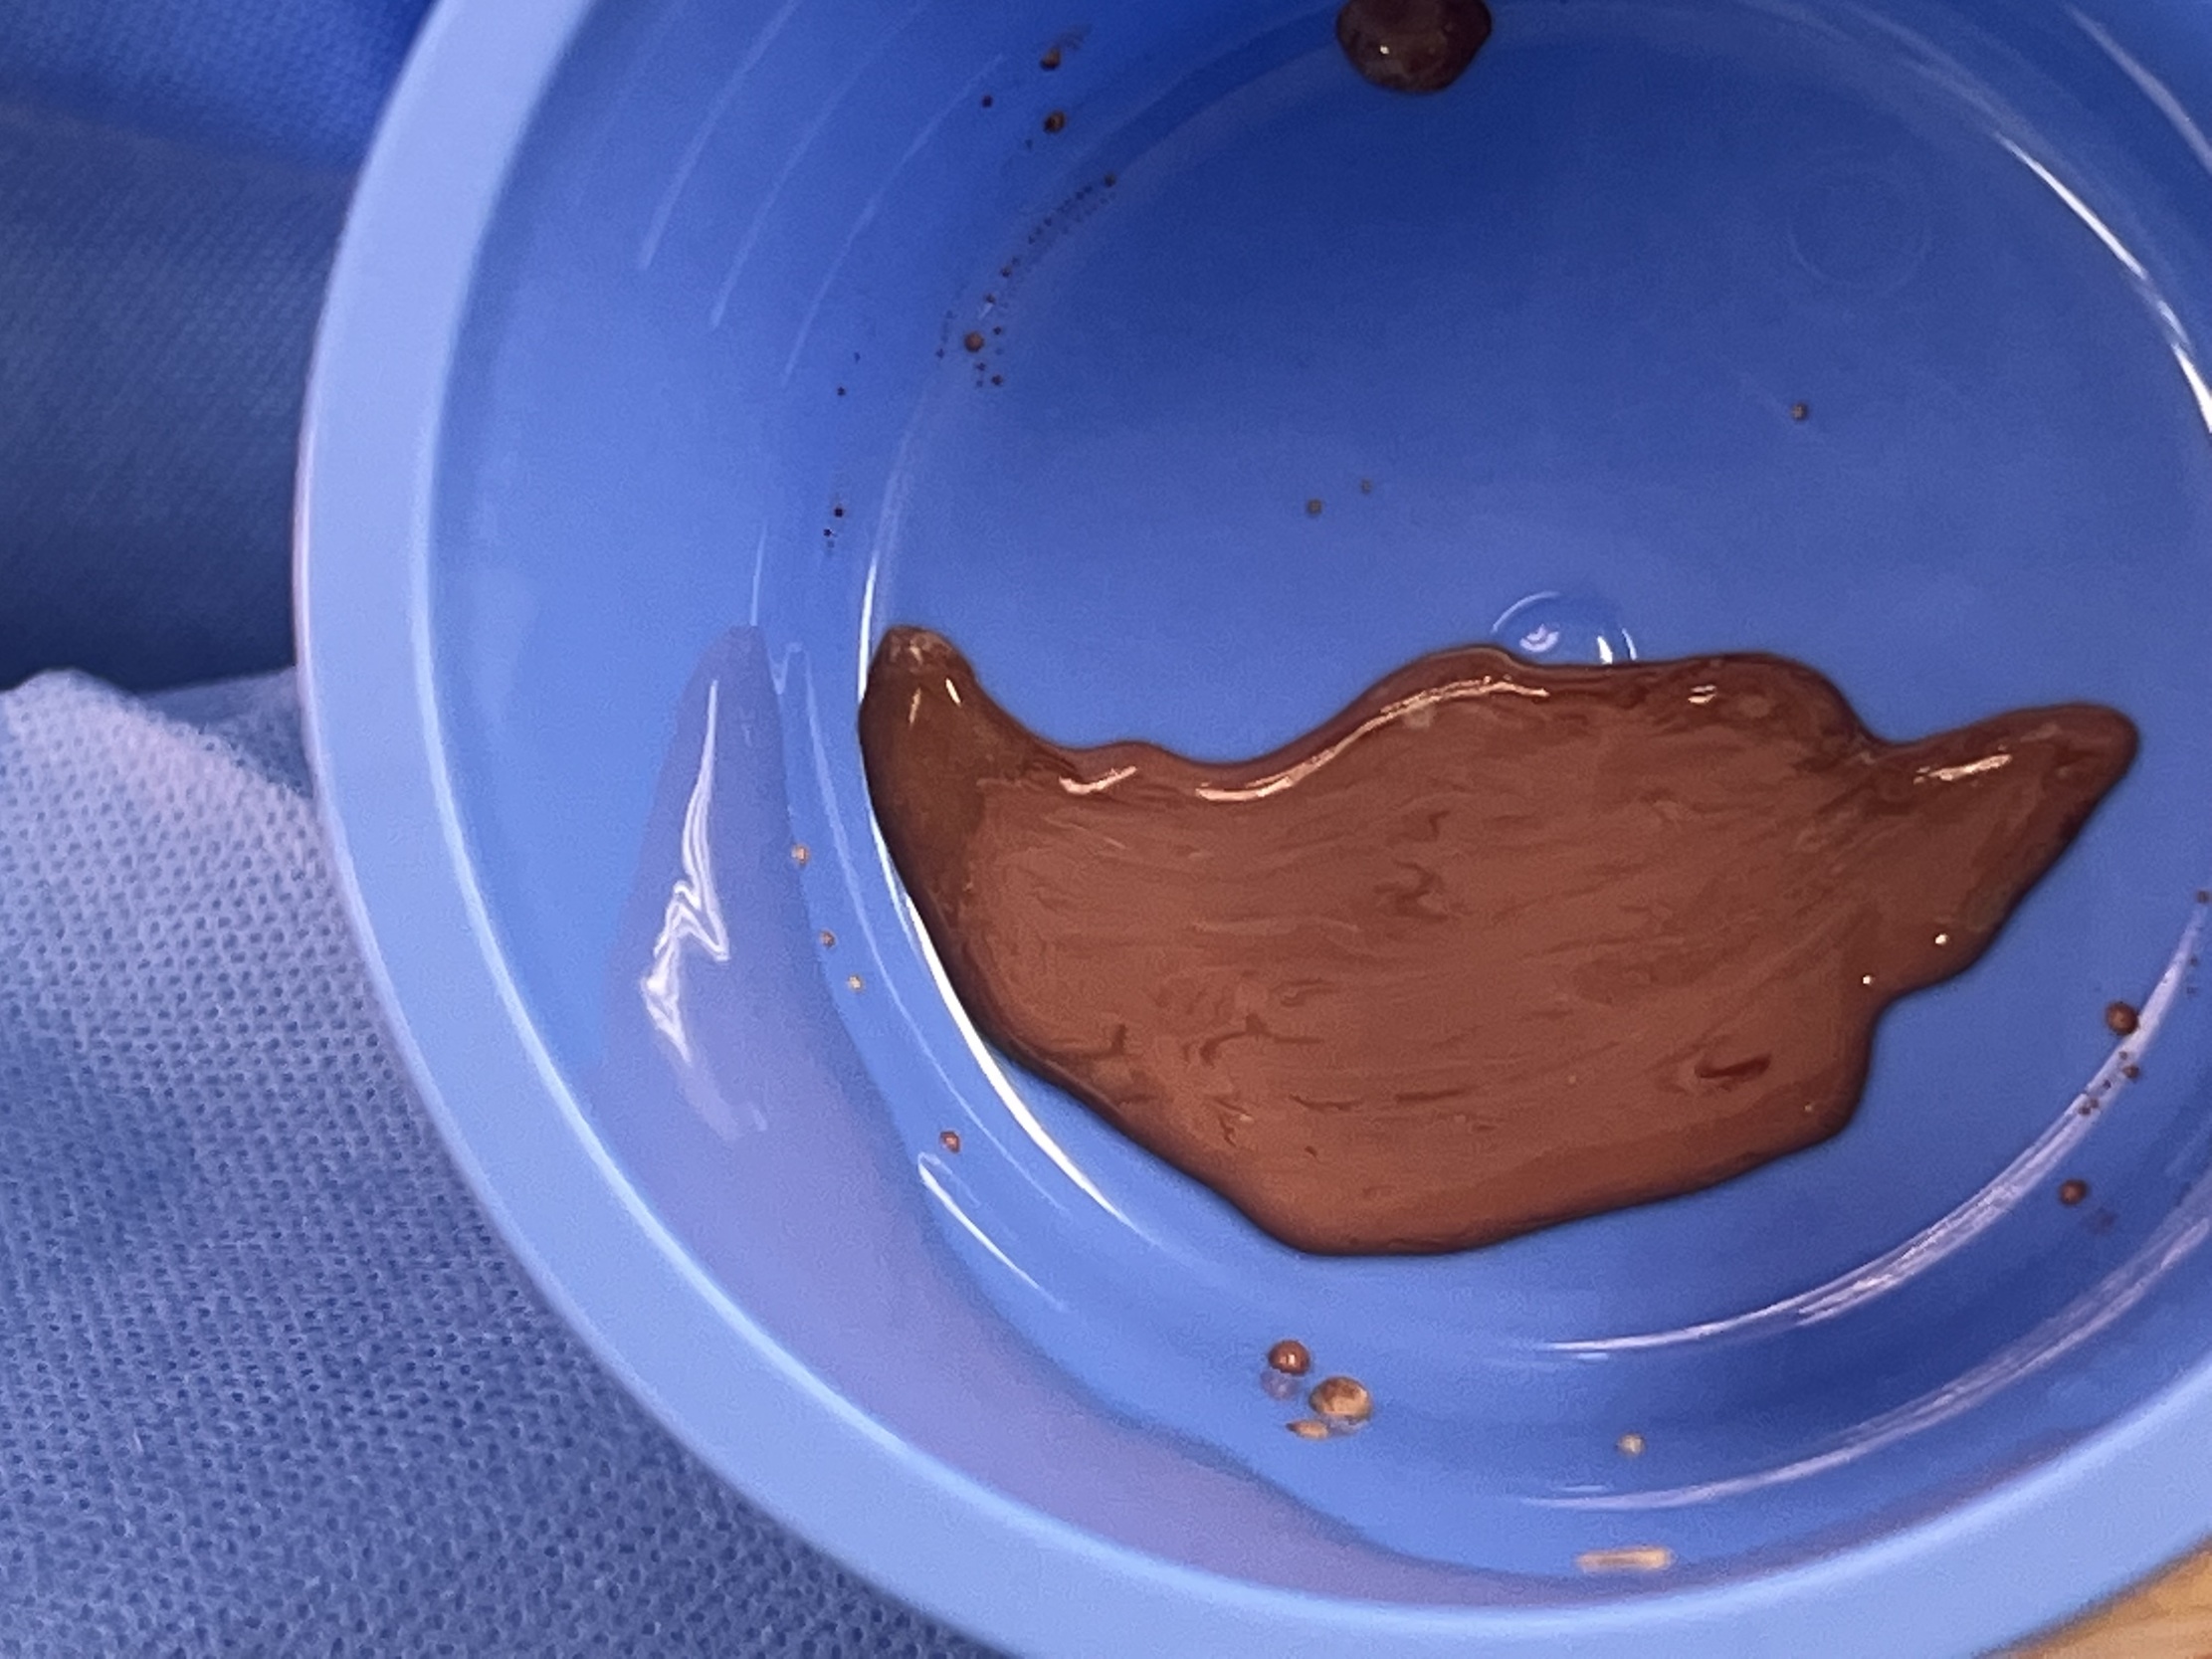
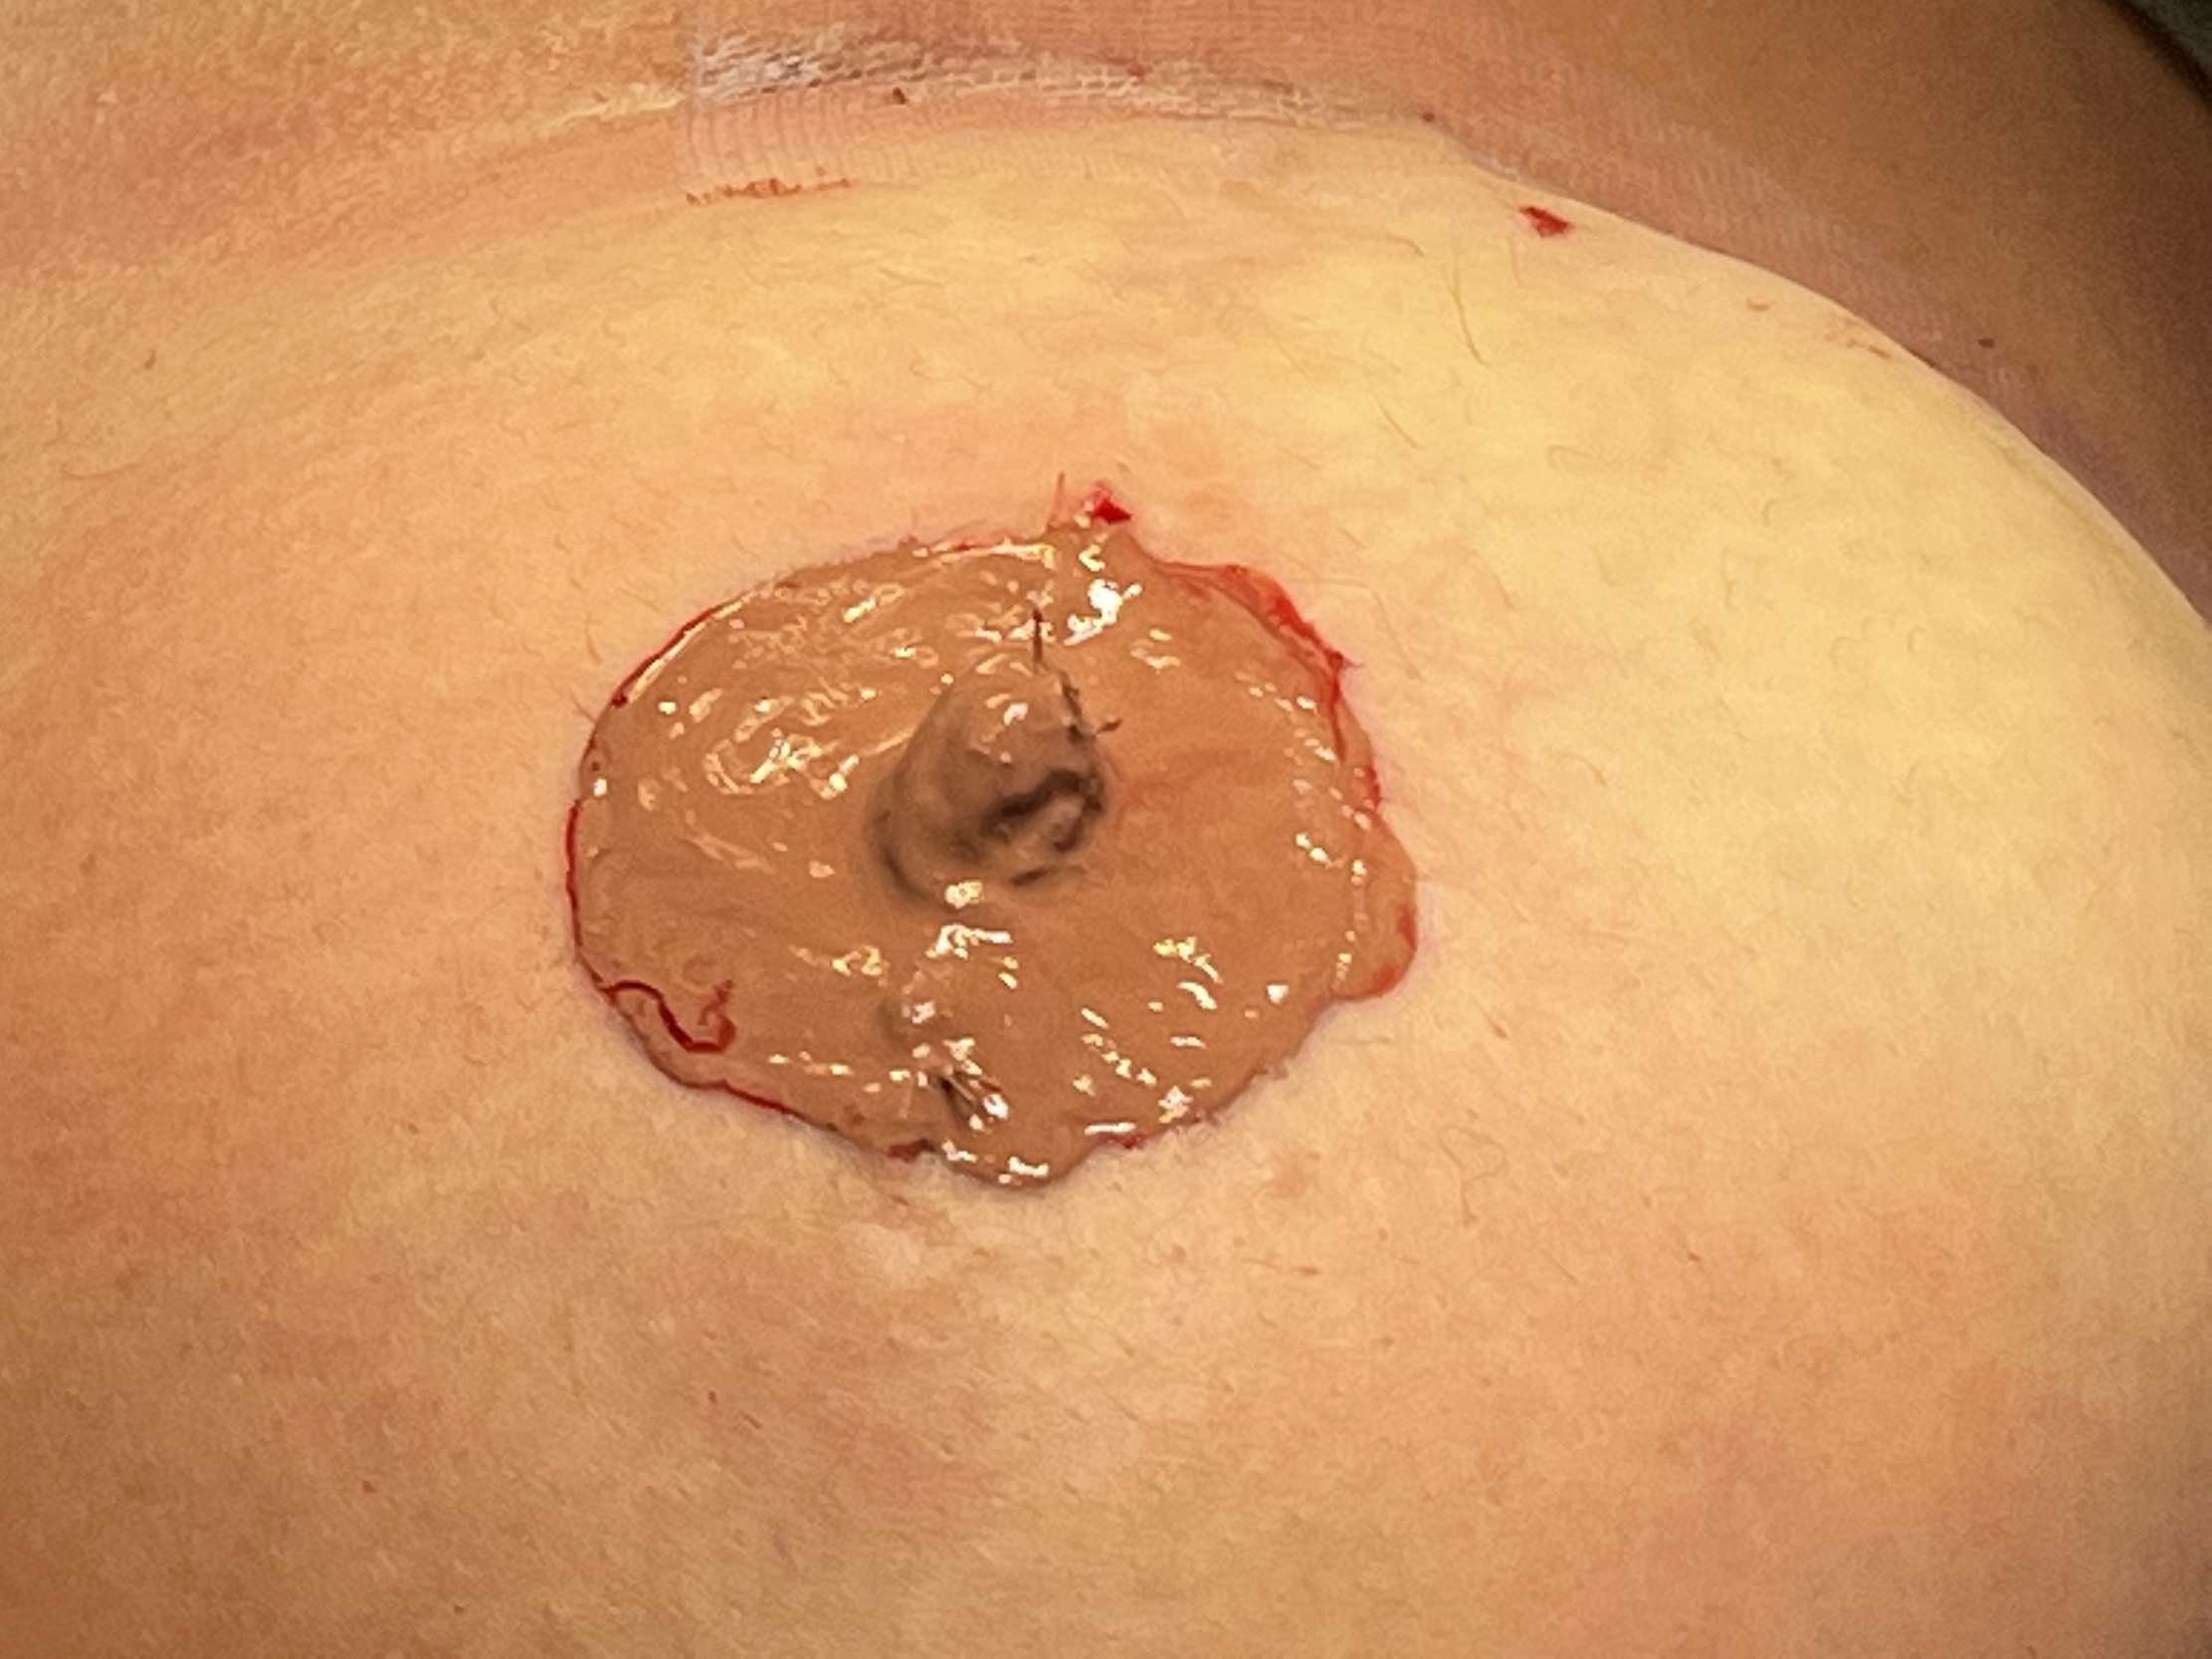
Tattoo inks (Biotouch© Pure Micropigments) can be mixed to provide personalised colour (figures 15 and 16). Once the procedure is complete, place the tattoo ink in a thick layer over the now-exposed dermis (Figure 17).

Postoperative care
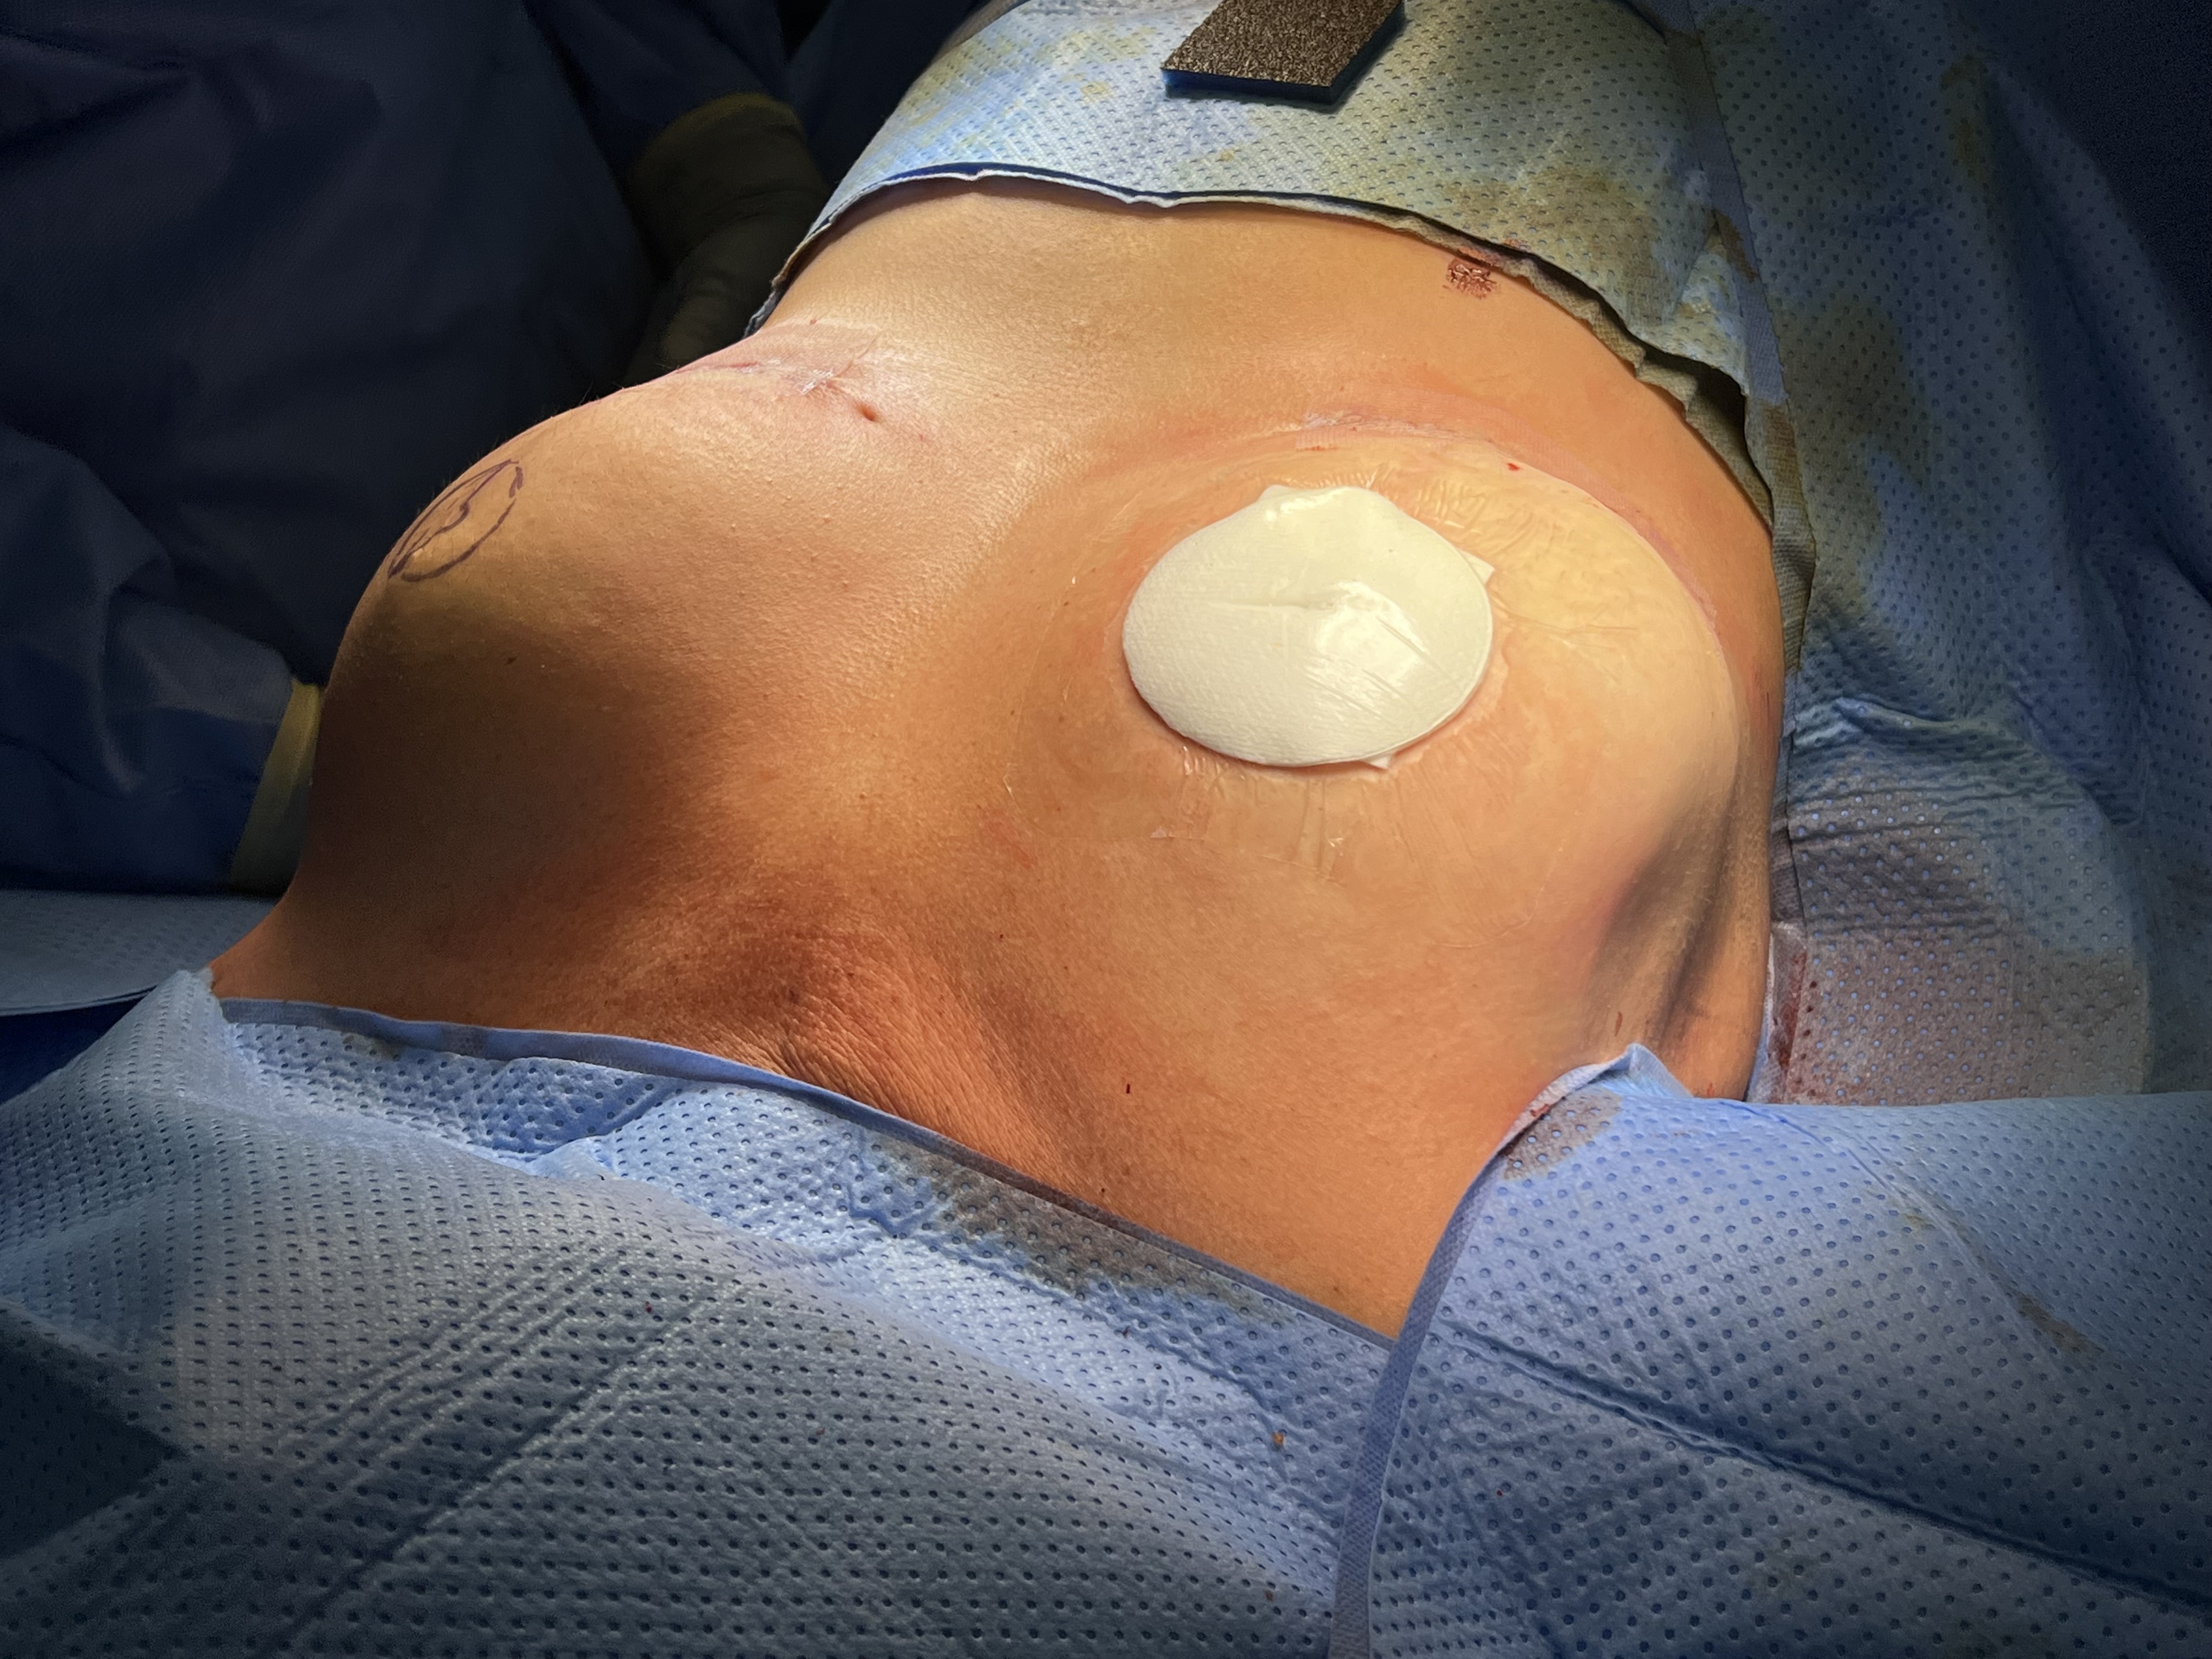
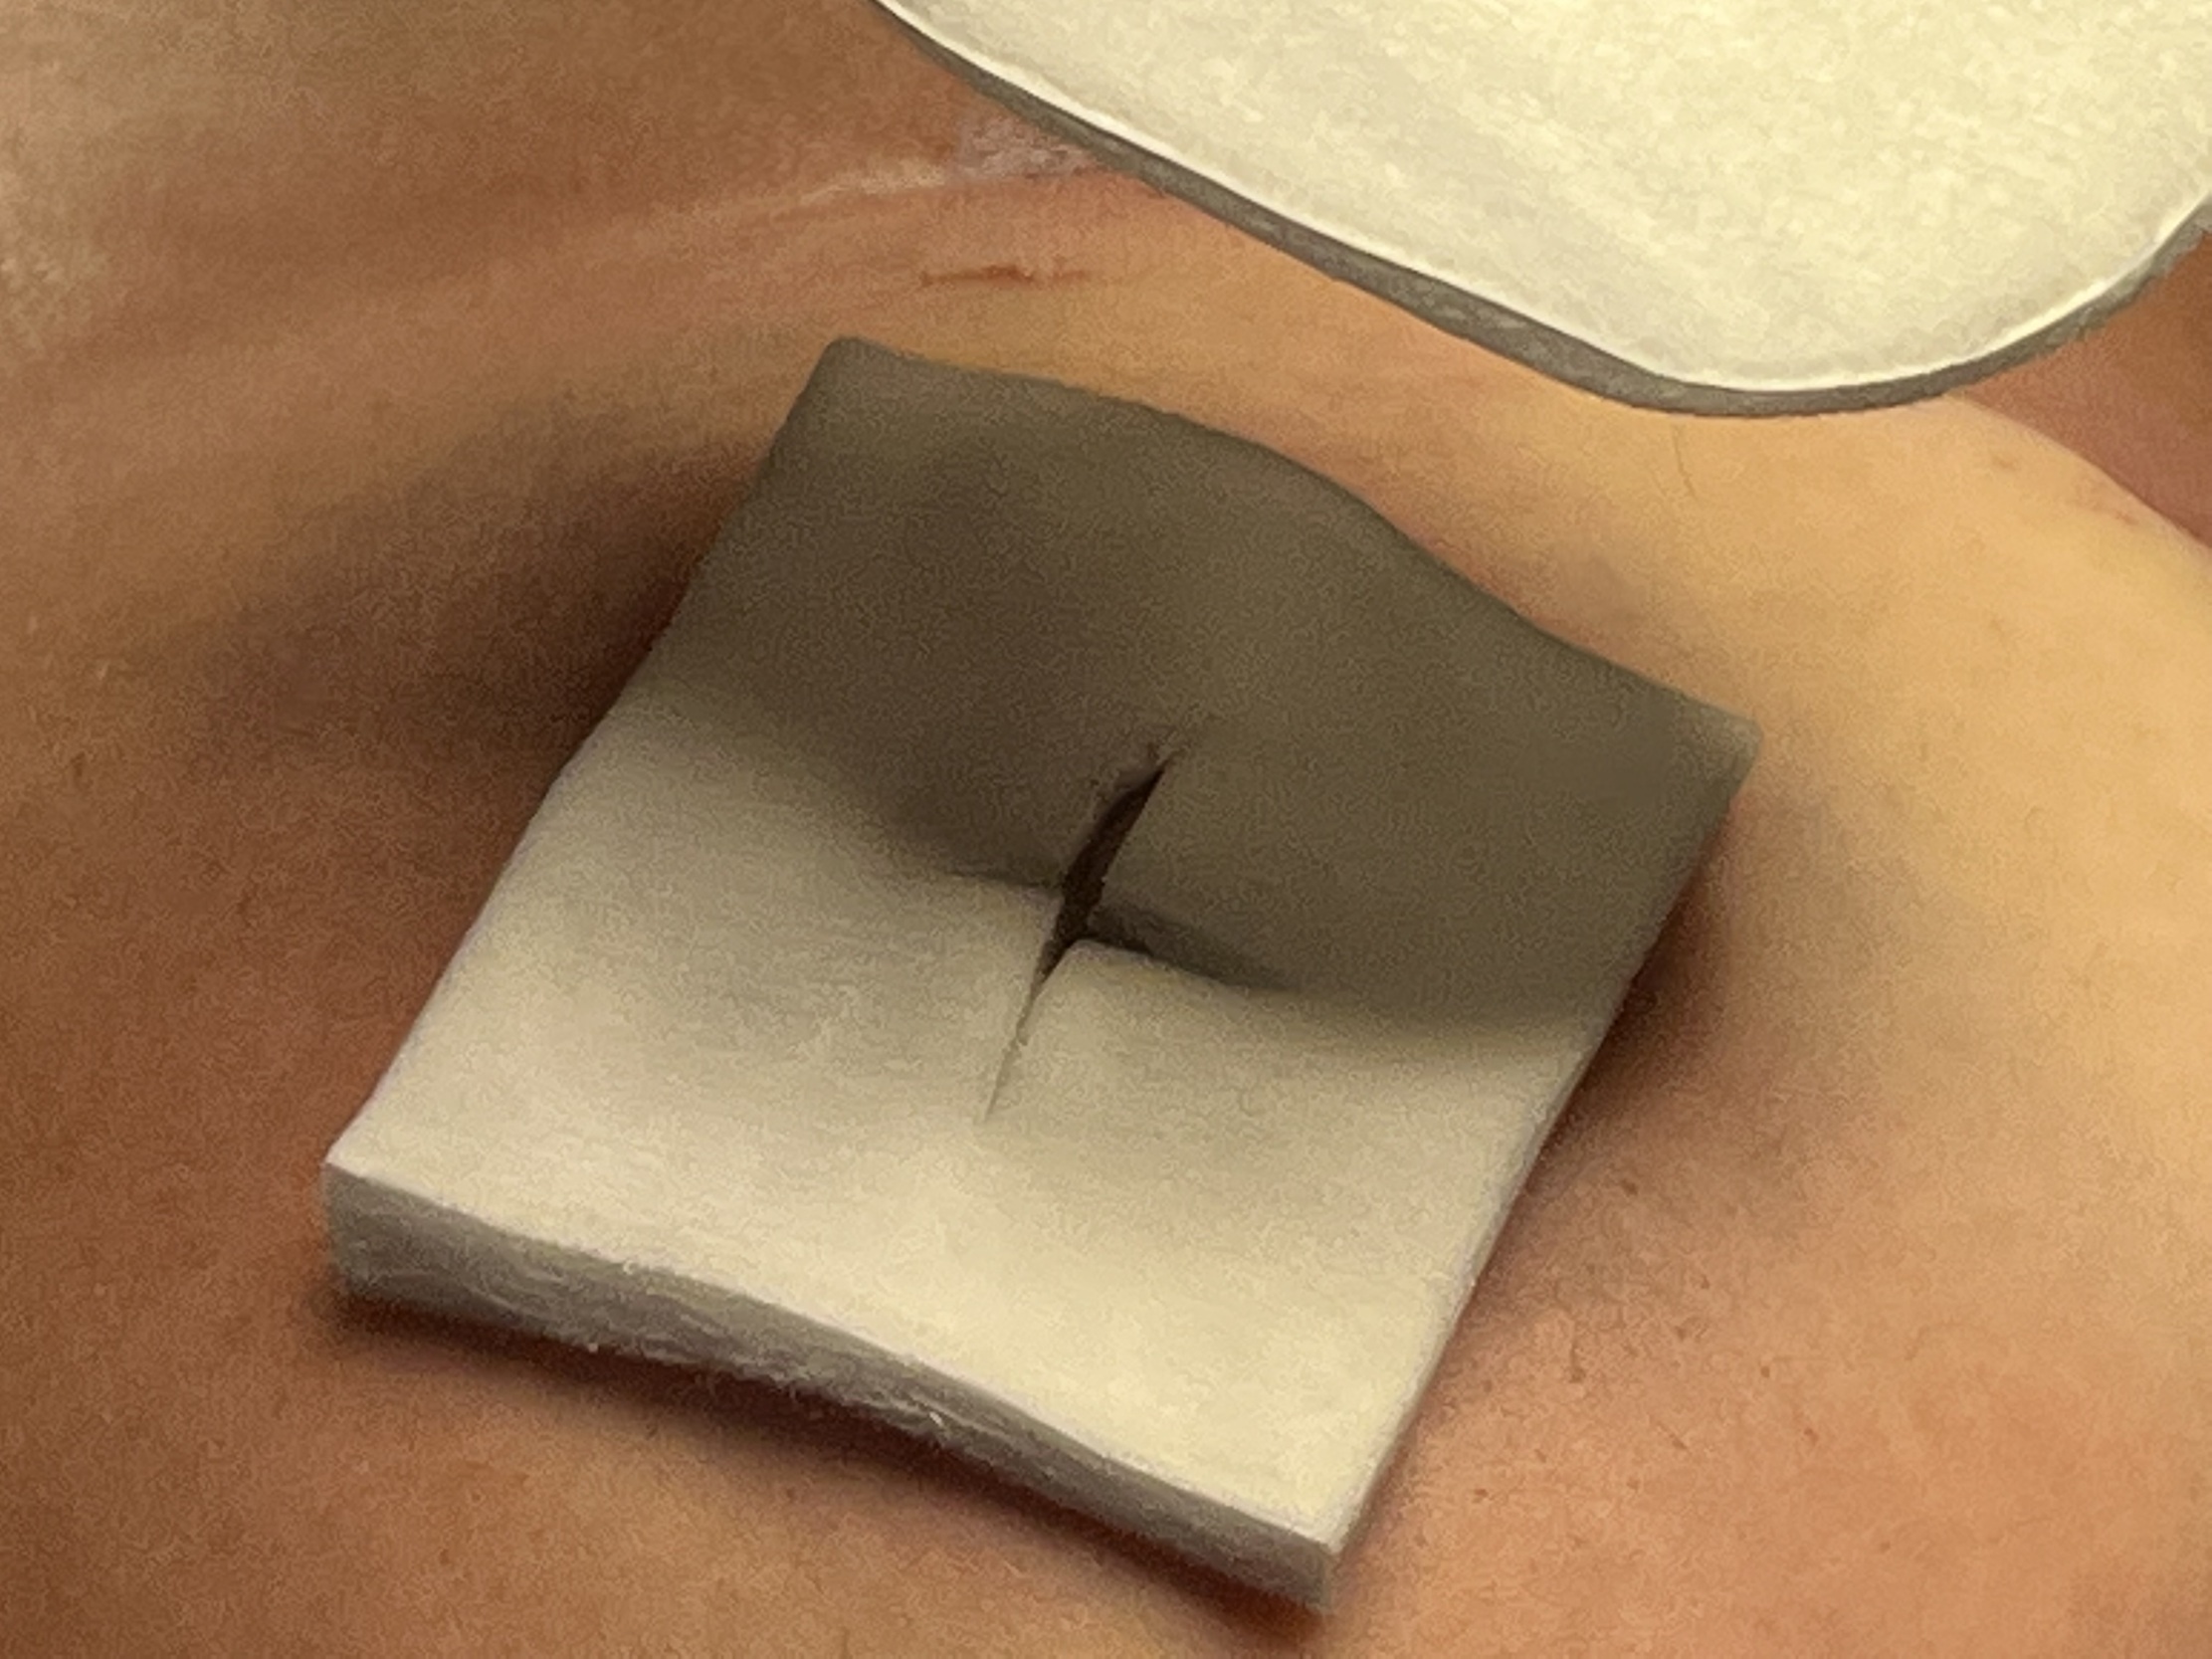
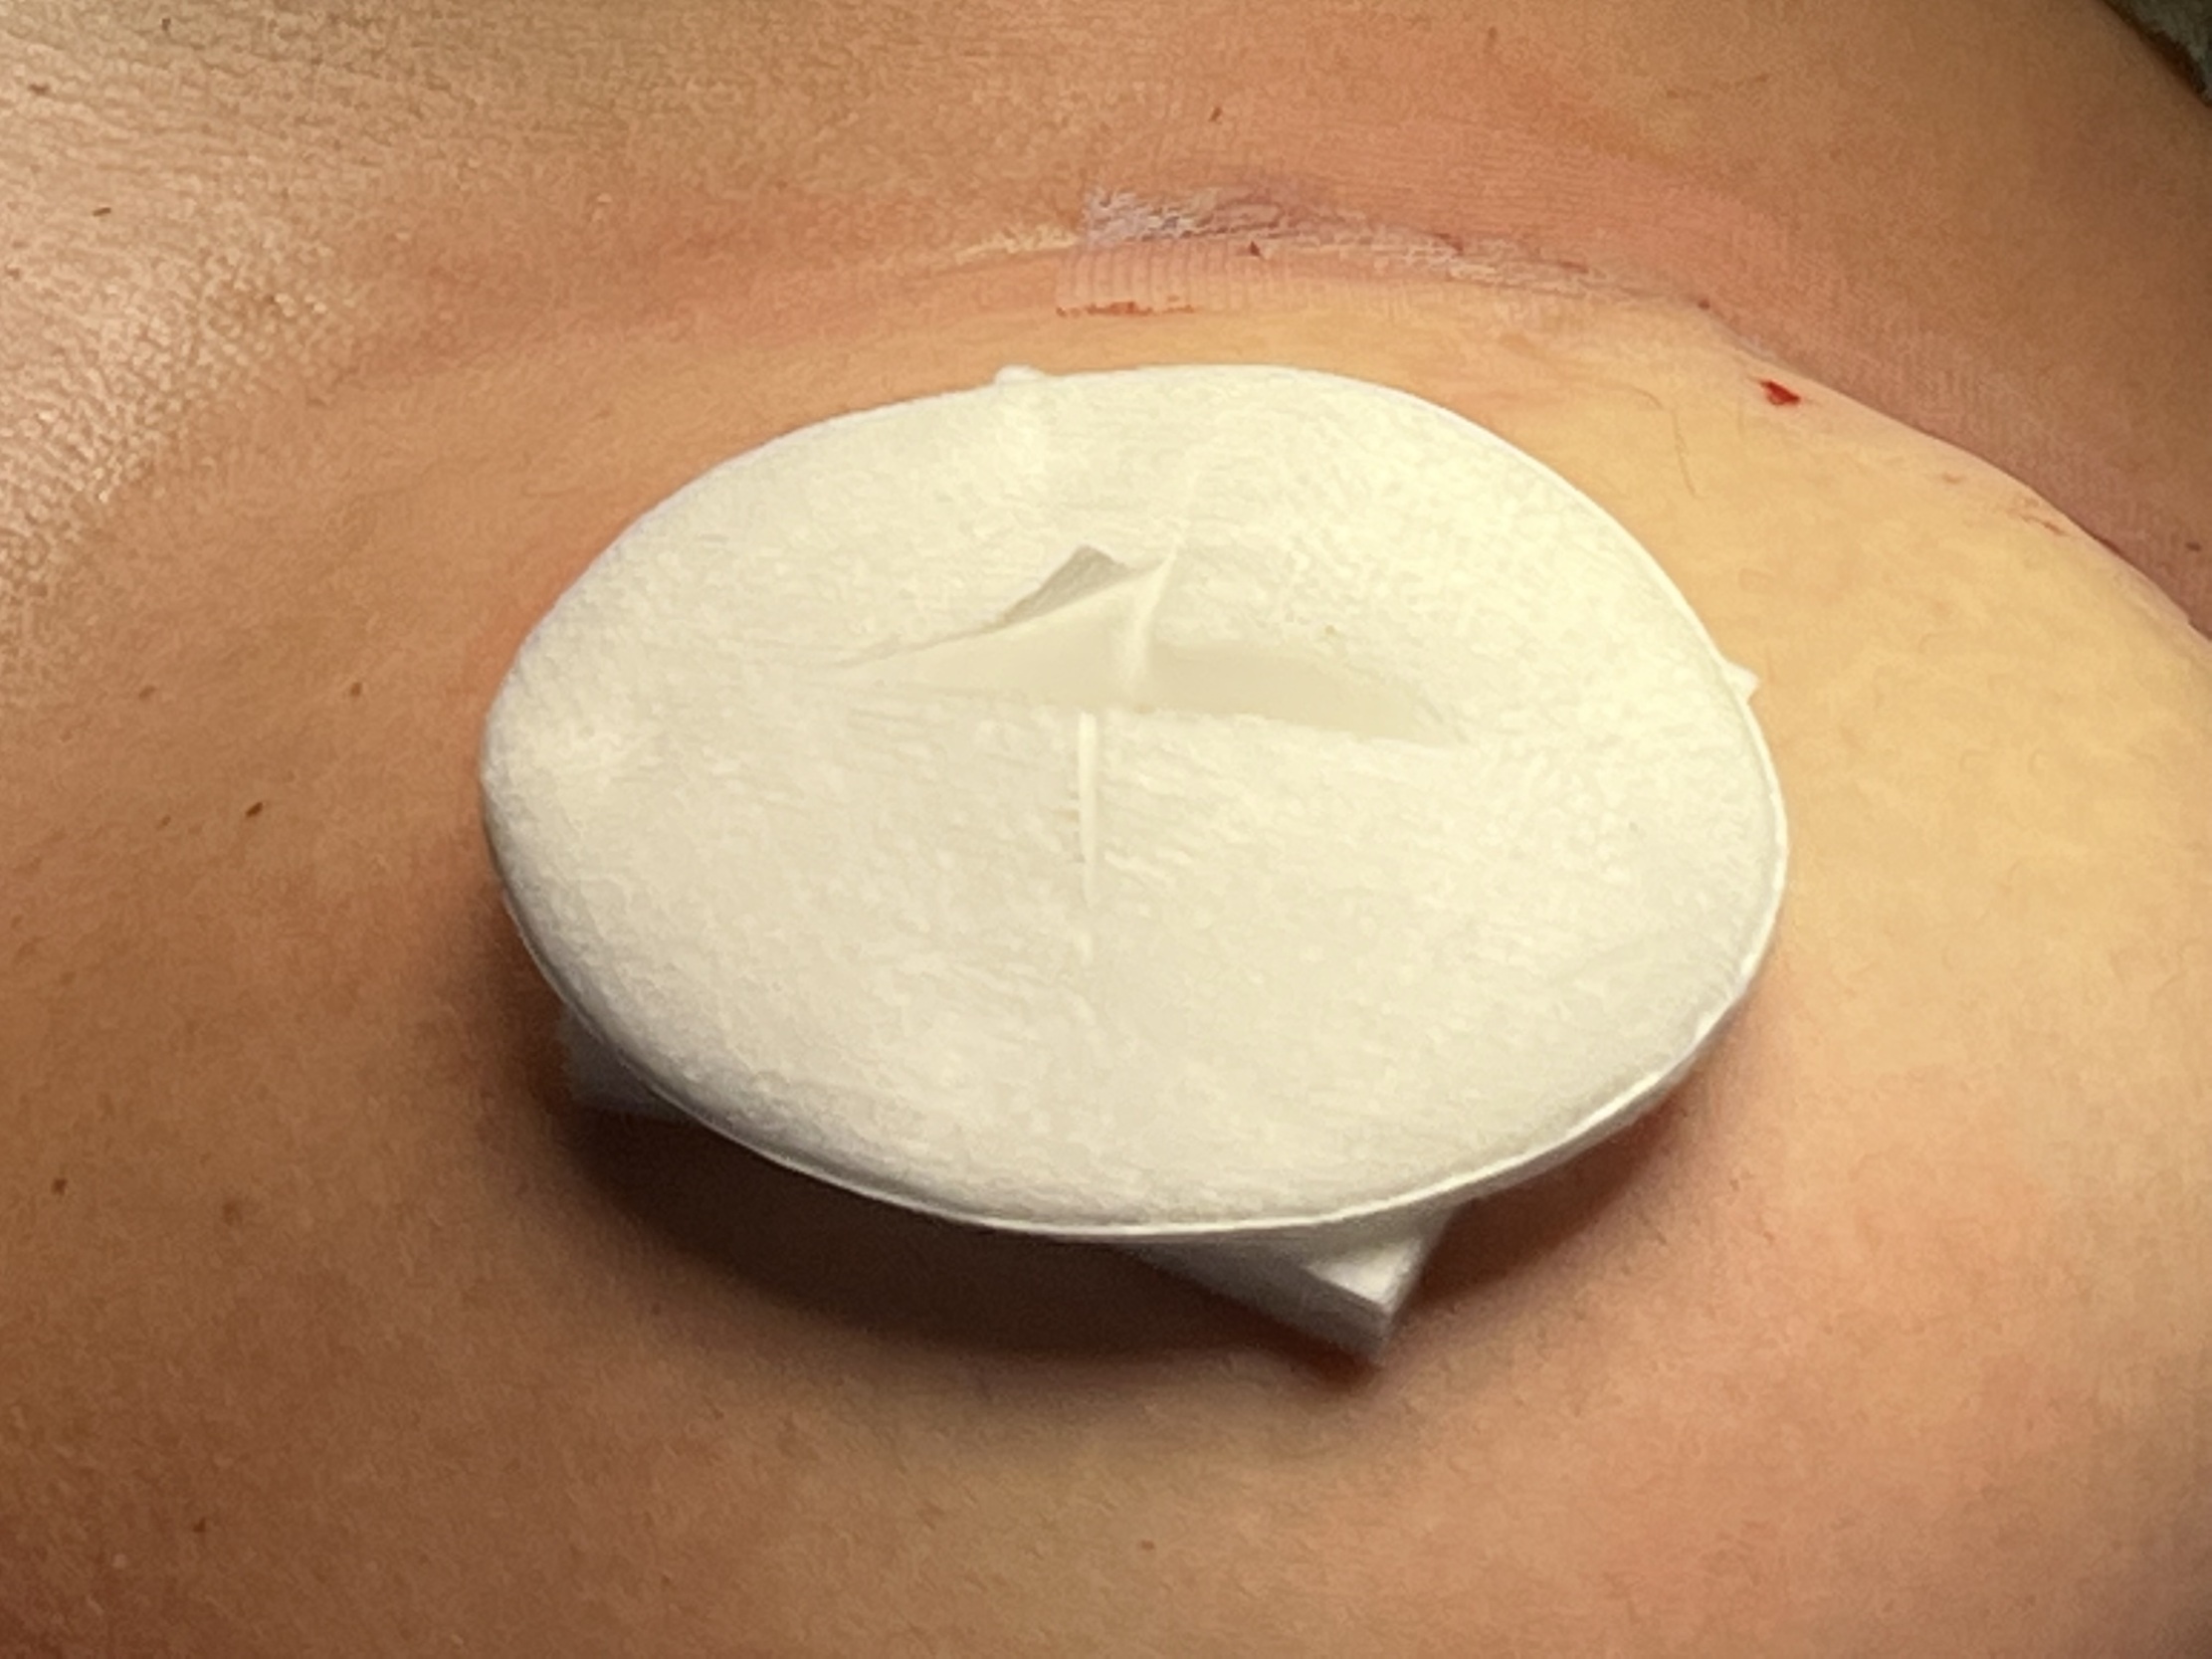
A small square of non-adherent Melolin® (Smith & Nephew) dressing, with central slits cut, is placed shiny side down over the new nipple and ink (Figure 18). Then a padded dressing is placed on top (Figure 19), followed by a transparent film dressing to keep it in place (Figure 20).

This is left undisturbed for five days before being removed in the office, usually revealing a fully epithelialised and now pigmented NAC. Emollient is then applied as per any tattoo.
Postoperative results
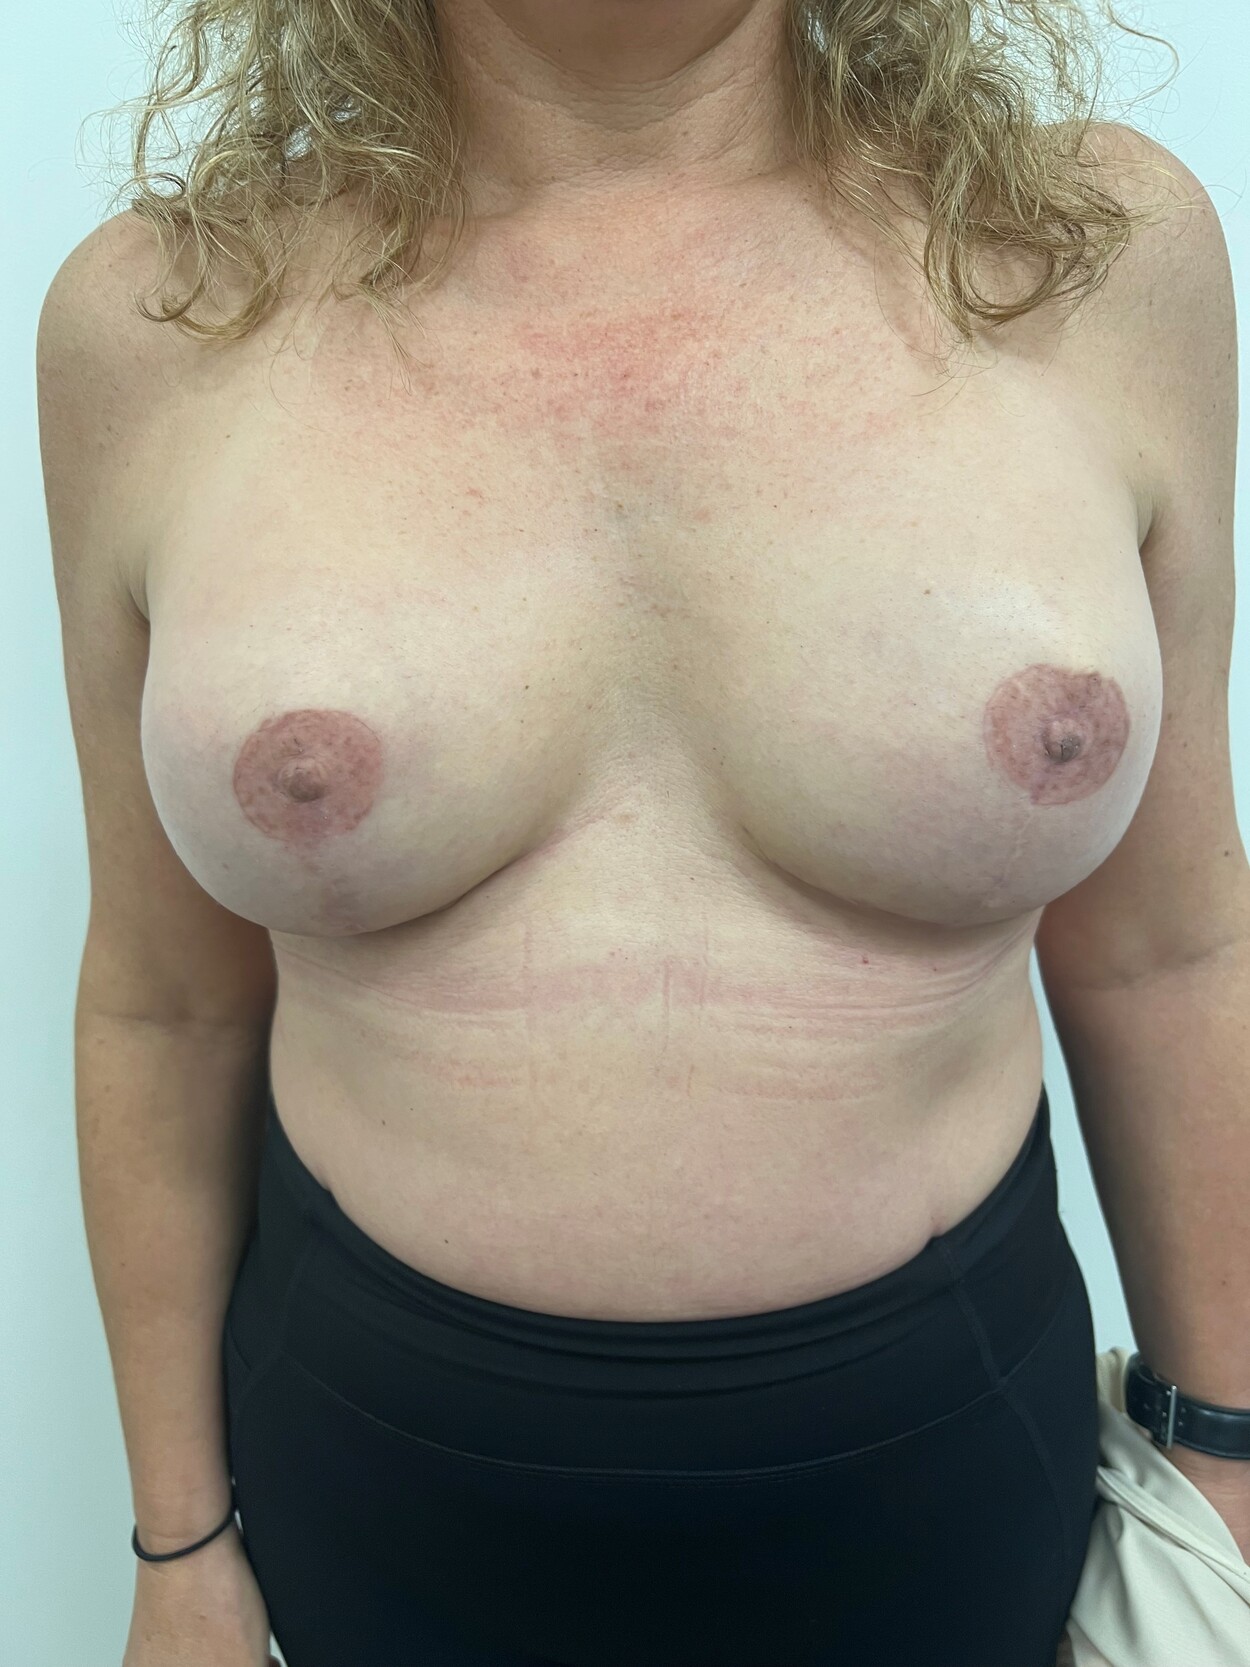
See photo gallery for further results.
Discussion
Tattooing involves the integration of pigment into the dermis. This can be done deliberately as is the case with cosmetic tattooing, or it can be due to contamination after a partial thickness skin loss injury that is inadequately cleaned, for example ‘road rash’. Typically, it is done using an ink-coated oscillating needle which punctures the skin and places the ink pigments into the papillary layer of the dermis. Since the body responds to this as a trauma, it induces an immune response. Macrophages phagocytose the ink, trapping it in their vacuoles but are unable to break it down, therefore containing the immune response. These vacuoles then hold the majority of the ink where it was placed in the dermis, with some escaping to lymph nodes and peri-vascular spaces.4
This technique uses dermabrasion with directly applied ink to mimic the ‘road rash’ tattoo rather than the direct needle inoculation of ink into the dermis. The senior author has found this to be effective and long lasting with around a 10 per cent touch-up rate over five years.
There is no consensus regarding techniques for nipple reconstruction, and even less so regarding tattooing. The majority of papers suggest tattooing postoperatively, but others have also suggested pre-reconstruction tattooing.5 In our opinion, colouring the areola at the time of nipple reconstruction completes the entire aesthetic unit and does not require the patient to go elsewhere for this final step. Of the papers found that discuss simultaneous reconstruction and tattooing all cases required the use of a specialised tattoo machine.6,7 This is potentially a limiting step for many smaller centres to be able to complete the tattooing for these patients.
Our technique may however serve as a solution to this. Most centres have cordless or air-driven drill systems available for several different specialties. This combined with the relatively cheap price of the required ink makes it an affordable alternative (36USD/3mL). It is also a simple technique which does not require significant training, unlike more specialised equipment, allowing it to be utilised and disseminated quickly.
To conclude, our technique is simple and cost effective, and uses simple equipment that is widely available. It is convenient and timesaving for our patients, who have expressed high satisfaction with the results.
Patient consent
Patients/guardians have given informed consent to the publication of images and/or data.
Conflict of interest
The authors have no conflicts of interest to disclose.
Funding declaration
The authors received no financial support for the research, authorship and/or publication of this article.
Supplementary online material
Videos accompanying this guide can be found on the
AJOPS YouTube channel: